

After hurricane Katrina in 2005 flooded our home of 22 years in Kiln, MS with about 4′ of water the period of June-Nov was always a stressful time for my wife Kathy and I. We had gutted the inside down to the studs, rebuilt everything, and knew that we could never face that again. Ninety-five percent of the work was done by Kathy and I. so, when June rolled around in 2015 we started talking and both agreed that maybe it was finally time for a change, where at least flooding would not be an issue. So, almost on a lark, one week late in June we began scouring Zillow and other real estate listing sites. We were targeting an area that would not be flood prone but would still be within driving distance of my place of employment, Stennis Space Center, since retirement would still be several years away. We set our area of interest from Wiggins to Picayune. We found probably 20 properties that were in our price range and looked possible, at least from the listings. We made a list of all of these and early one Saturday morning we set out on a road trip to drive by each one of them. Knowing real estate listings can be deceptive and don’t tell you much about the surrounding areas we wanted to set eyes on them before trying to schedule any appointments to view. Of that initial 20 we found 3 that we even wanted to go inside of. Most of them we didn’t even get past the driveway before we were turning around for one reason or another.

The following Monday Kathy contacted a real estate agent to schedule viewings of those 3. Since this is a page devoted to me creating the Lumberton ham shack I’m going to cut to the chase. The house in Lumberton checked all our boxes. It had basically been a one-family home since it was built in the 60’s and now the 80s’ish matriarch of the family decided it was time to sell and move closer to one of her grown children in Chicago. The house was meticulously maintained, had about 3 acres of property (for an antenna farm) and the deal sealer for me, at least, was the 20’x30′ empty room attached to the car port. The moment I walked into it I saw “ham shack”. It was pretty much an empty shell and was going to take a lot of work but that was one of the things I liked about it. I was finally going to be able to have my own space, totally separate from the main house and I could build it exactly the way I wanted it to be. The room had been used as a workroom/storage. The old acoustic tiled ceiling had long since been ripped out, probably due to water damage. The floor was old particle board that was also deteriorating. The walls were old, ugly paneling. The paneling was discolored from the space never being climate controlled but looked to be in decent shape. This is pretty much where the rebuild journey begins.
Unfortunately I don’t have a good “before” photo of the inside. But here is the carport. The room is on the back end of it and actually has somewhat of a “basement” below. Almost unheard of in south-central Mississippi but the elevation here is 318′.
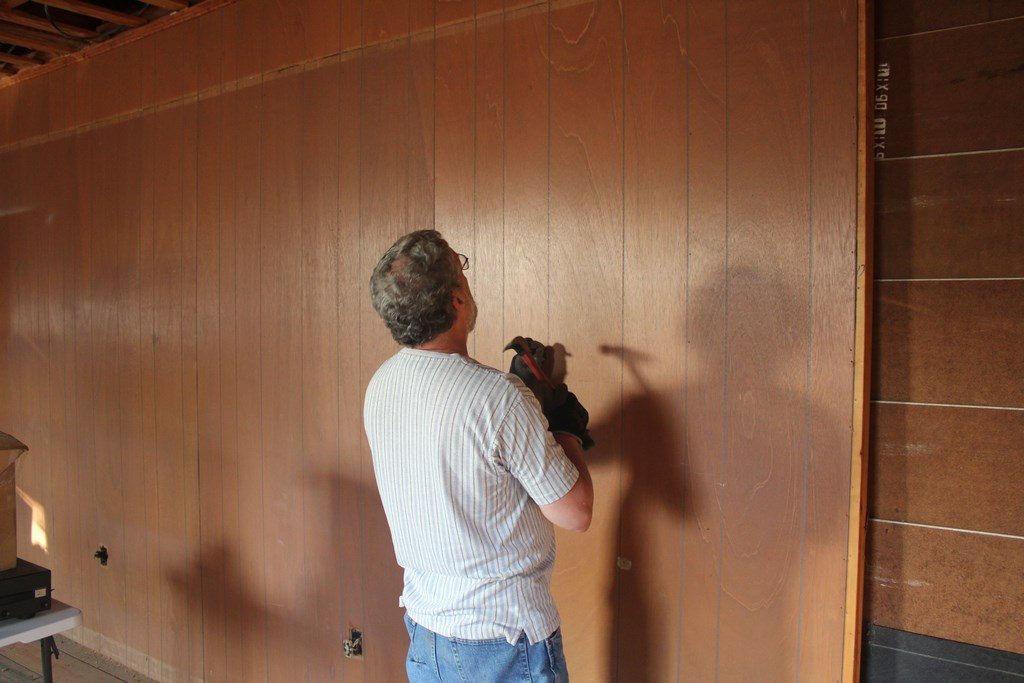

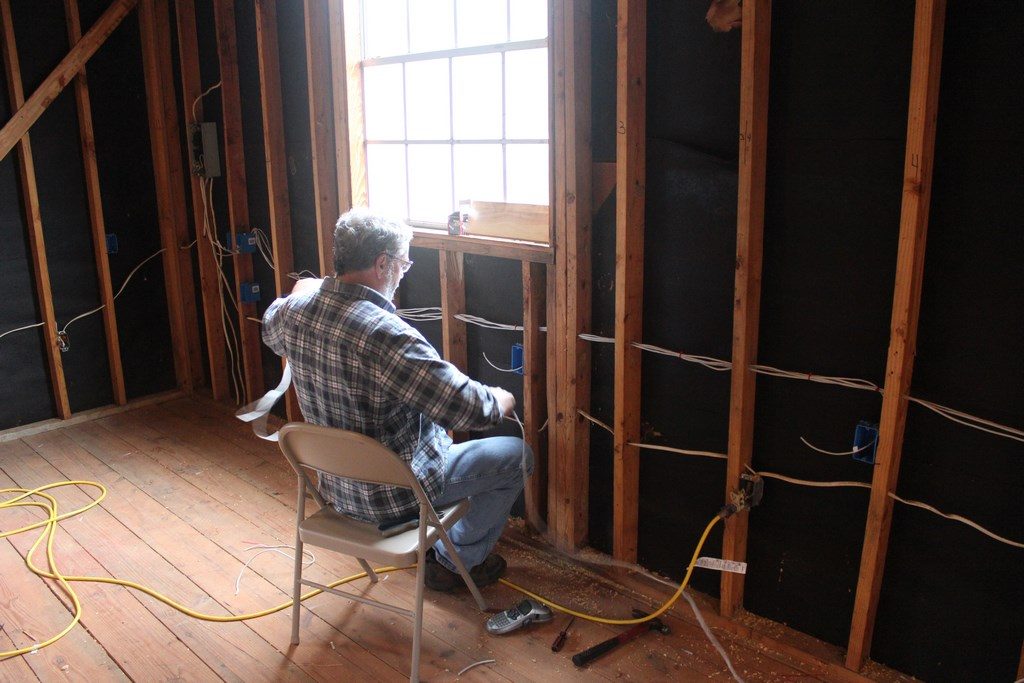
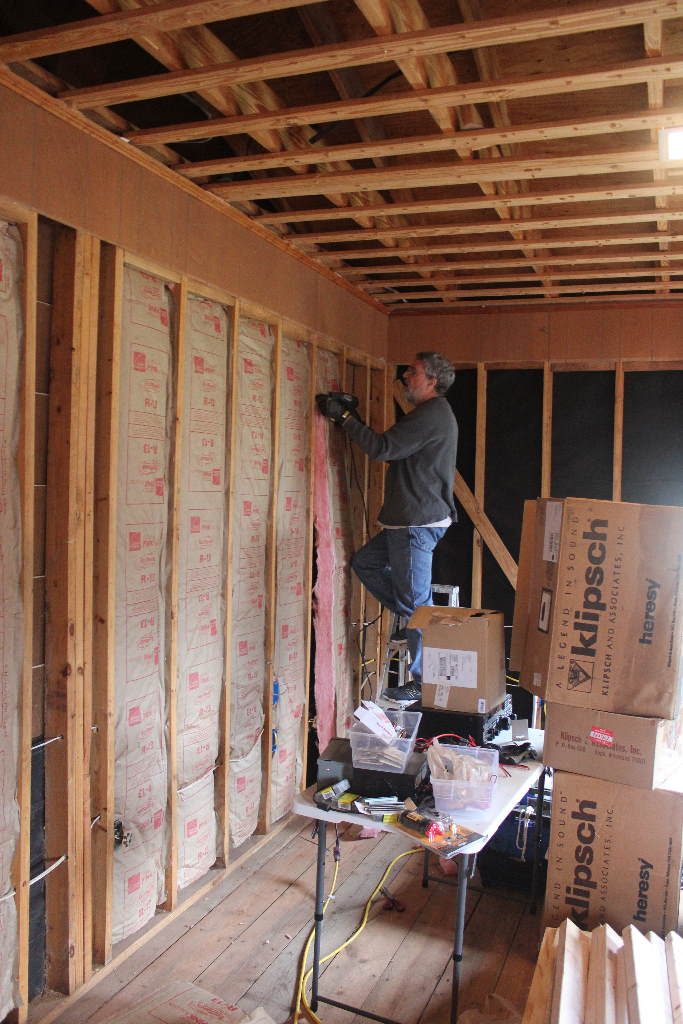
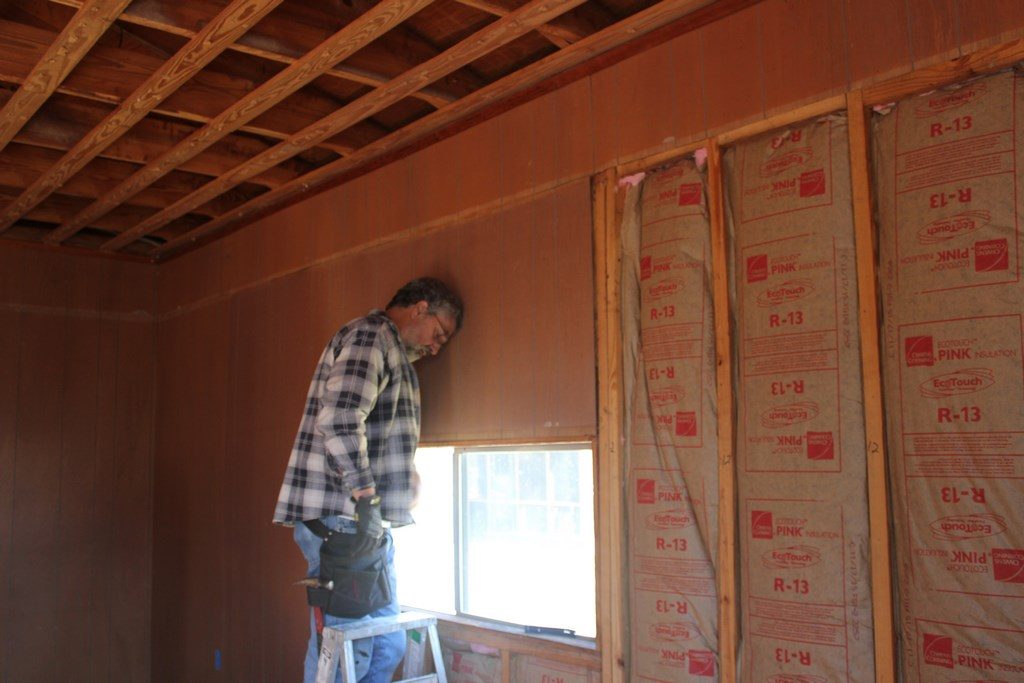
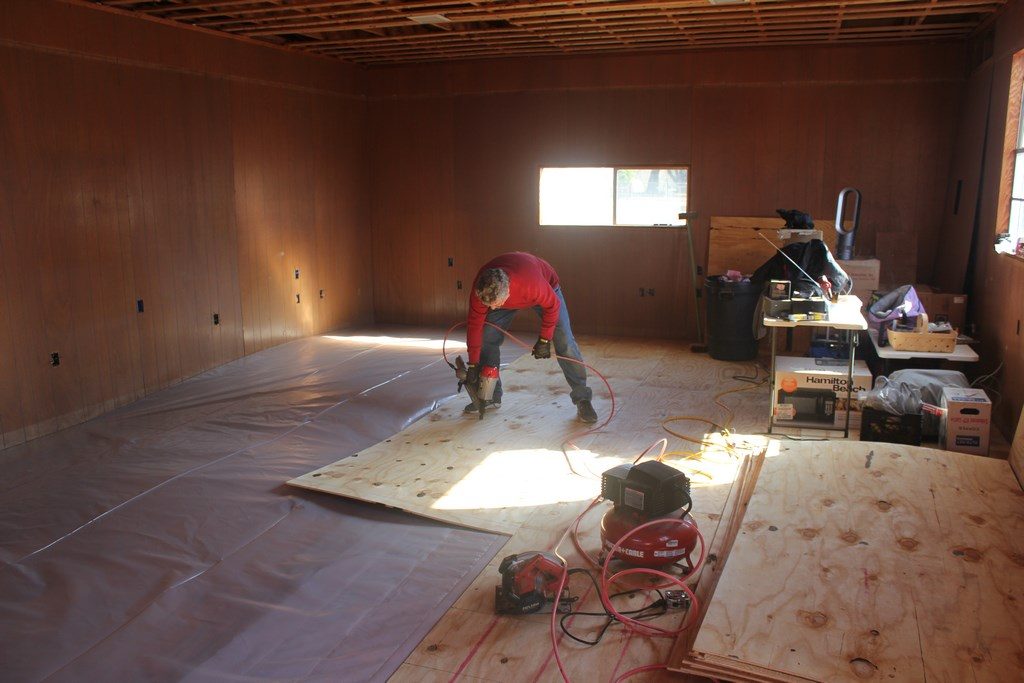
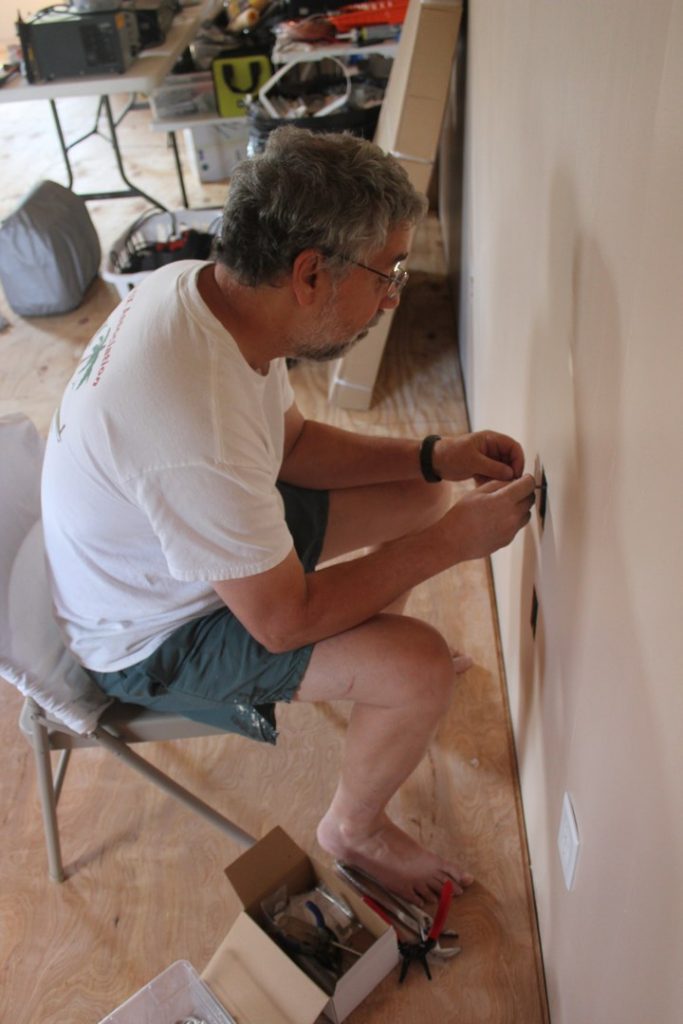
These 2 photos give you an idea. There was no insulation on either the walls or ceiling so I knew everything was going to have to come off the walls to allow me to could insulate them. The ceiling was in better shape to accommodate insulation since it still had the the 1″x4″ grid that had been support for the original acoustic ceiling. In the photo on the right the entire particle board underlayment had been scraped up leaving the original 2″x6″ sub-floor. I was glad to see that this was in great shape. I consulted with a few friends on how best to deal with the paneling. I was dreading having to scrap it all and hang sheet-rock. One friend suggested that if I was willing to just paint the old paneling it might be possible to salvage it. It would all have to come down, of course to allow me to insulate but if it was in decent shape, and I was careful, he said I could take it down, insulate, rehang, patch any bad spots and then paint. His suggestion for taking down involved taking a countersink punch and simply punching the small panel nails through the panel into the 2×4 framing. Photo on the left shows me doing this.
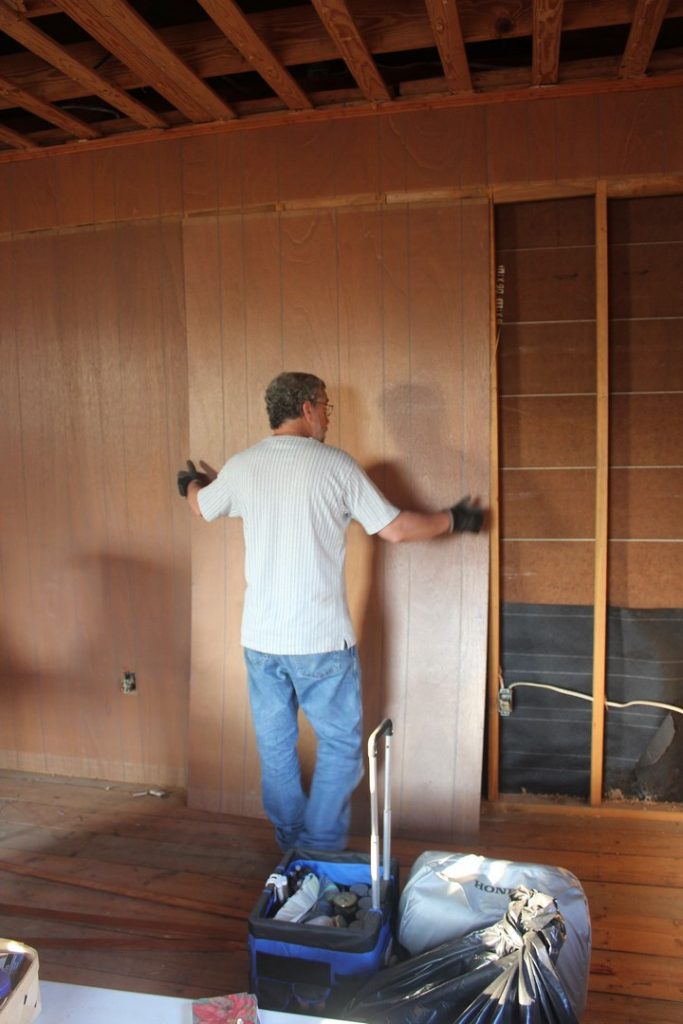
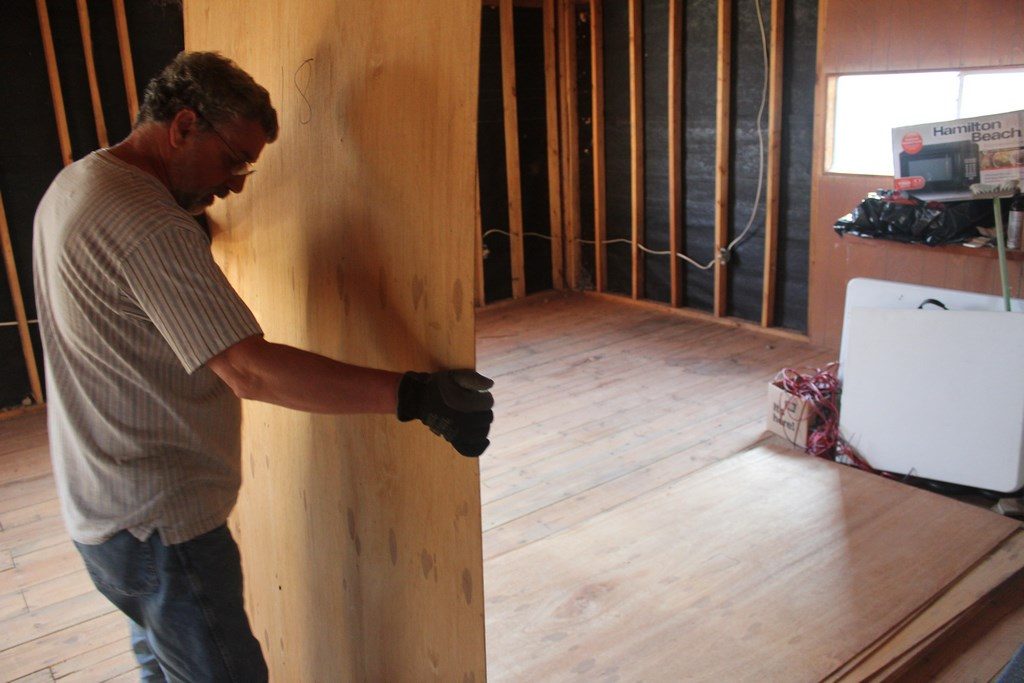
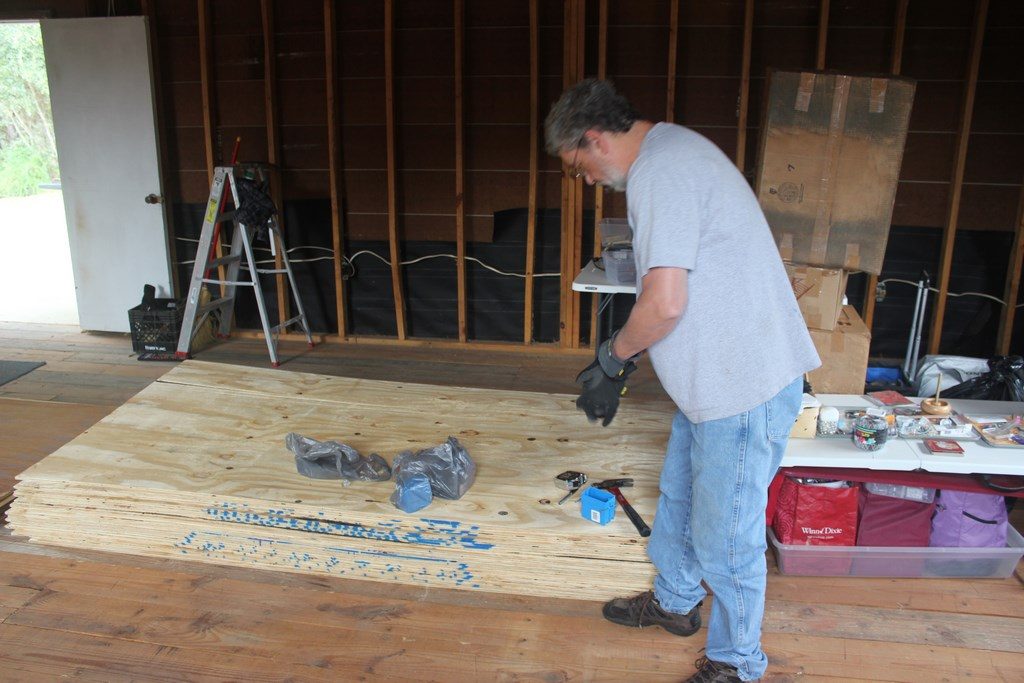
So, I started going around the room, not entirely confident that the paneling would survive coming down or go back up cleanly. I had decided to number the back of each panel to identify its location on the wall. The studs on the area of wall a panel came off of were marked with the same number. There were roughly 27 panels total. I then simply stacked the panels on the floor planning to put them back up in reverse order of coming down. If it worked it would be a heck of a lot easier and cheaper than having to either put up new paneling or hang sheet-rock. Spoiler alert… It worked!!! And I am forever grateful to my electrical engineer at Stennis at the time, Leo Foster for the panel removal idea. Leo continued to provide very valuable guidance throughout this project.
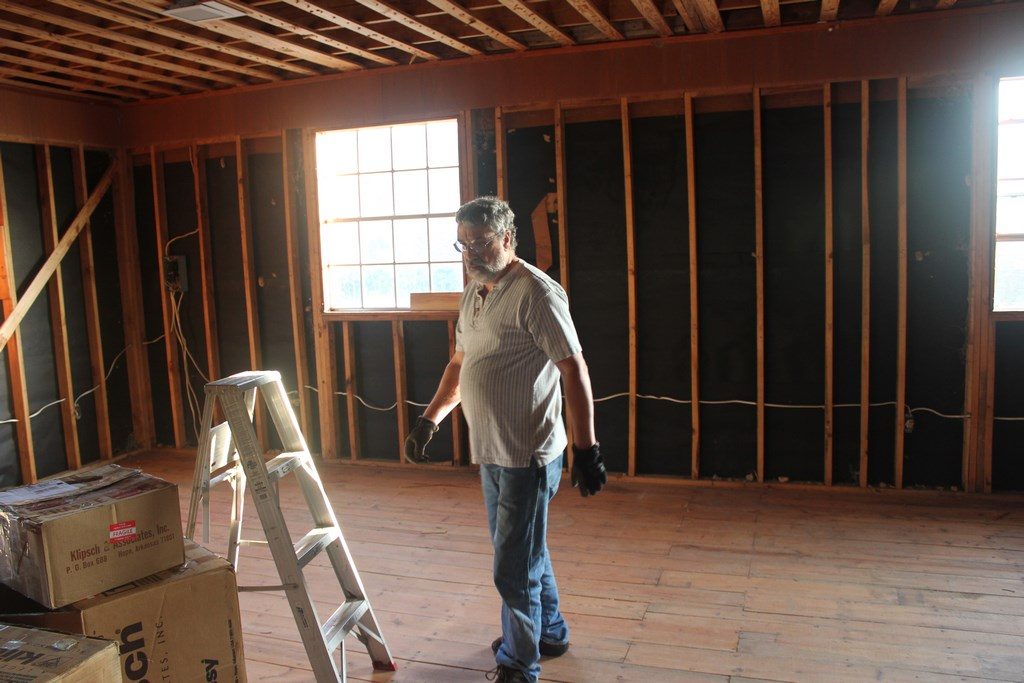

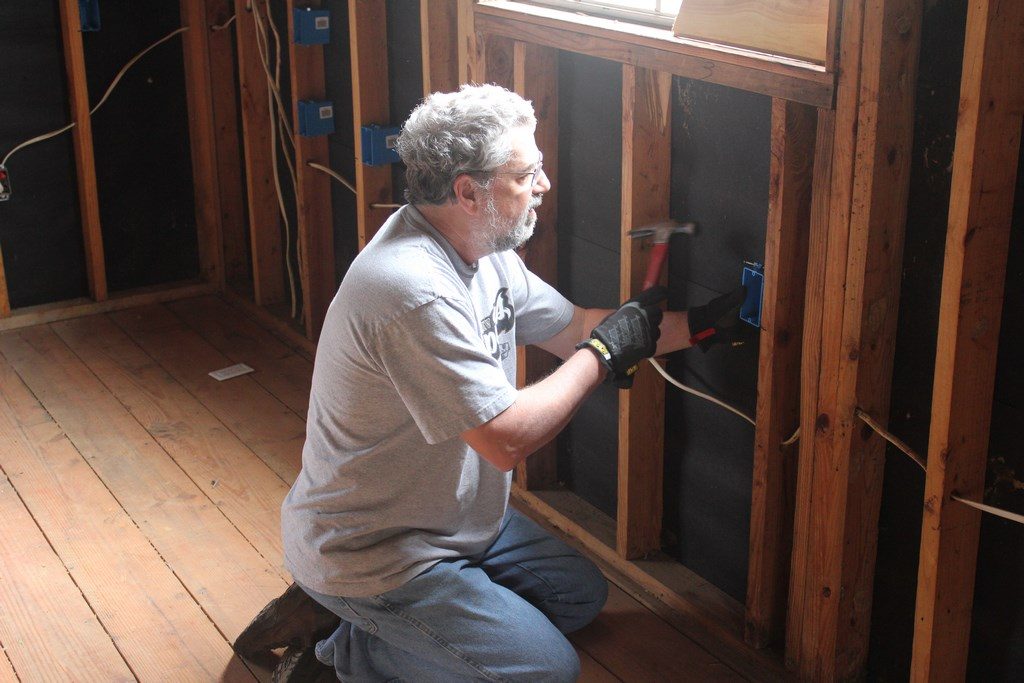
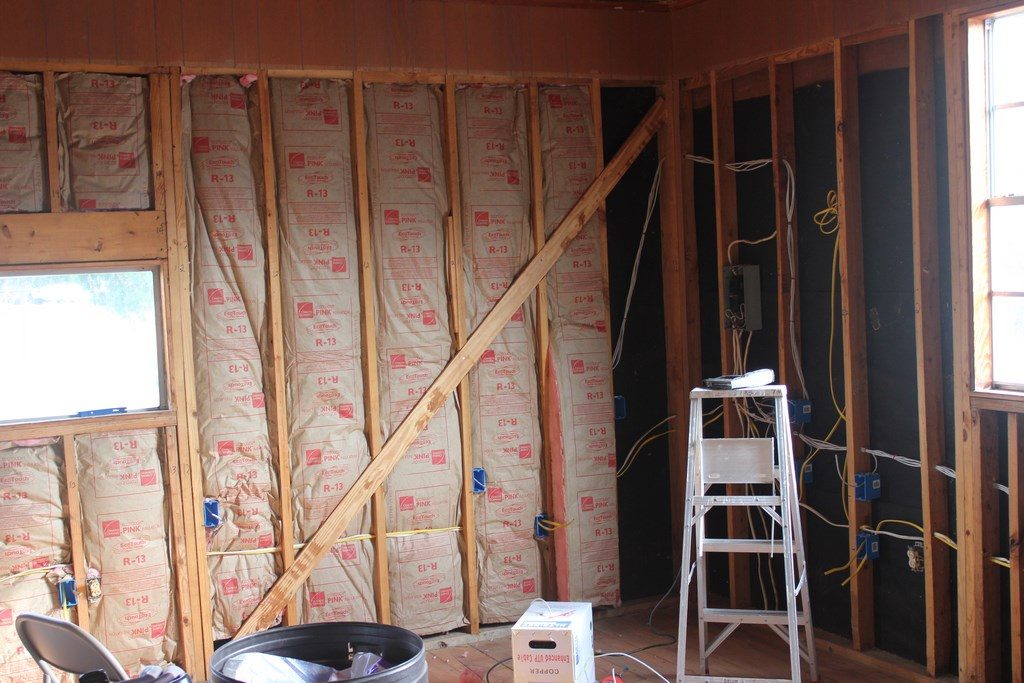
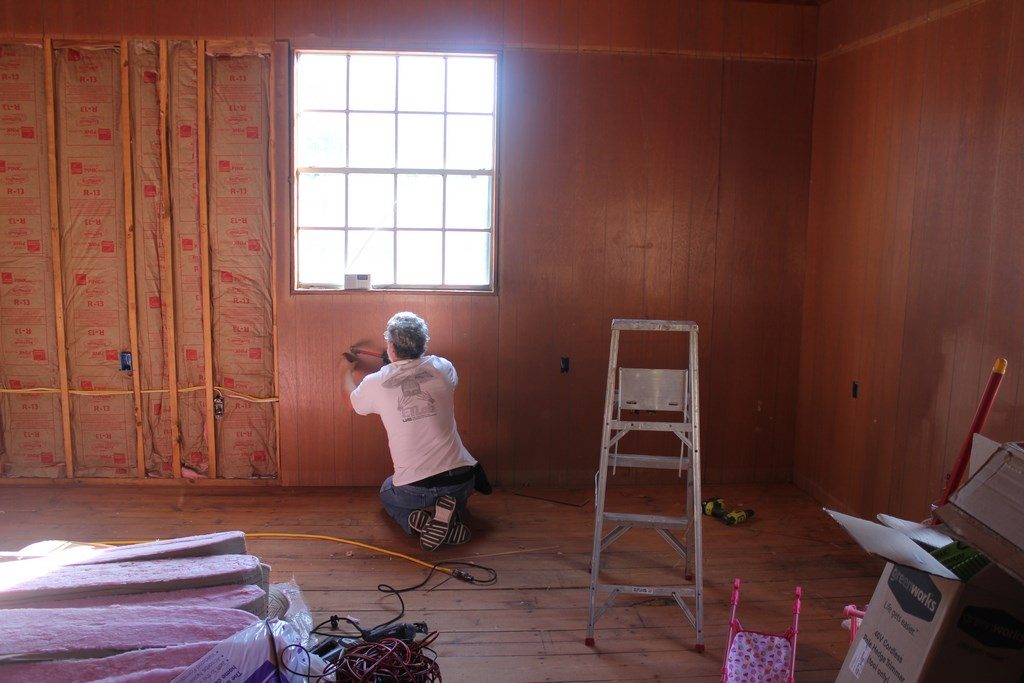
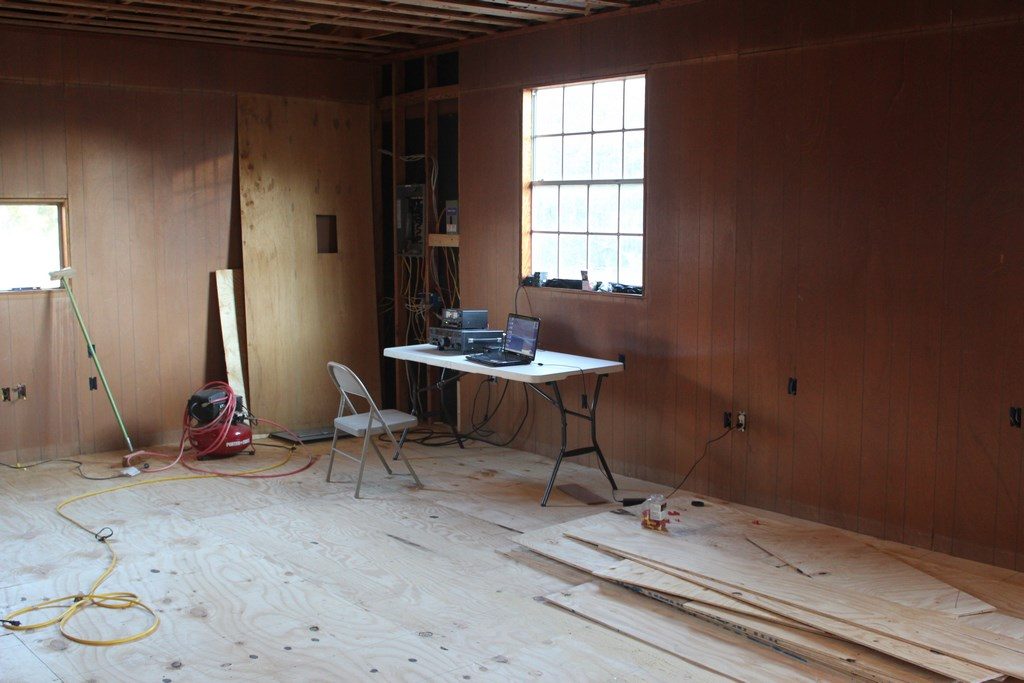
So, with all the paneling removed and existing wiring exposed it was time to tackle electrical upgrades that were going to be needed. There was basic wiring and 120 VAC outlets already installed from the sub-panel in the back corner of the room. But, I was going to need more to support the eventual multiple stations I planned for the NA5NN club station. We would also need multiple 240 VAC dedicated outlets to support amplifiers and to provide A/C-Heating for the shack. The upper right hand photo above shows what I had to work with as far as a load center. It was small, maybe 6 pole spaces and even worse, it was fed from the main panel on the house with 10 AWG wiring. While this might be fine for a few small 120 VAC circuits to run small power tools it wasn’t going to come close to supporting my needs. More on that in a bit. The original wiring and boxes were all in reasonable shape so I reused them but I did install new outlets in all of them.

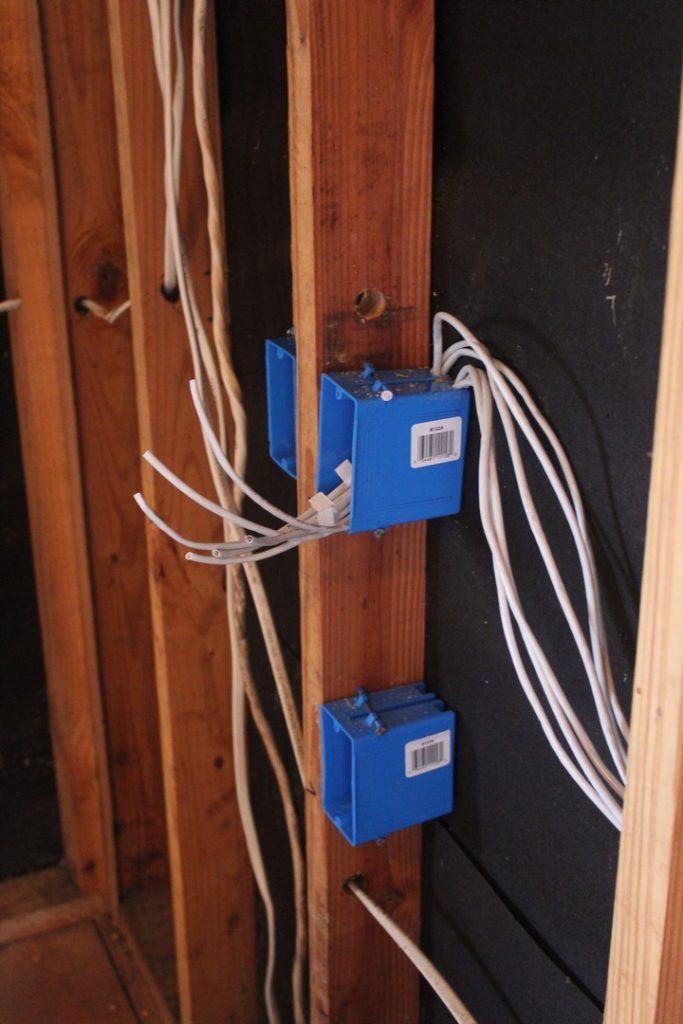
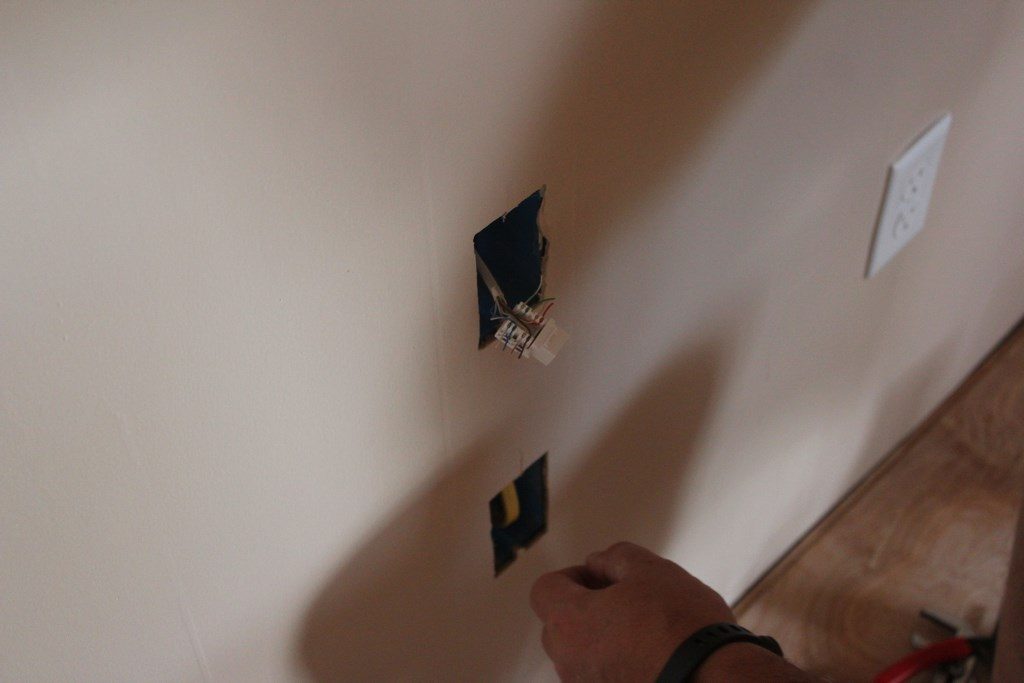
In addition to upgrading the electrical I planned to run Cat 5e Ethernet cable throughout the room back to a central distribution panel to connect to a Gigabit Ethernet switch. The photos above show me installing the boxes and running some wire. I installed them about 8″ above the electrical outlet boxes. The two boxes together in the bottom right photo is the distribution point for the individual outlets. I installed 12 drops in all, concentrated in the areas I planned to have stations setup but a few others scattered around. If I had it to do over again I’d install twice that amount. You would think an old network engineer would know better…
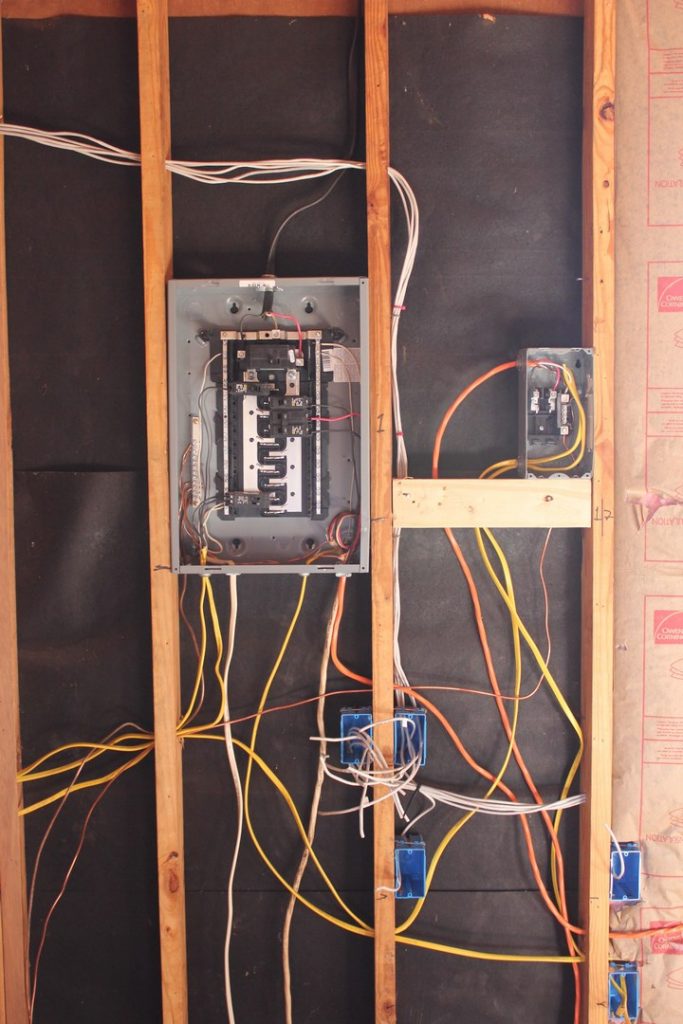
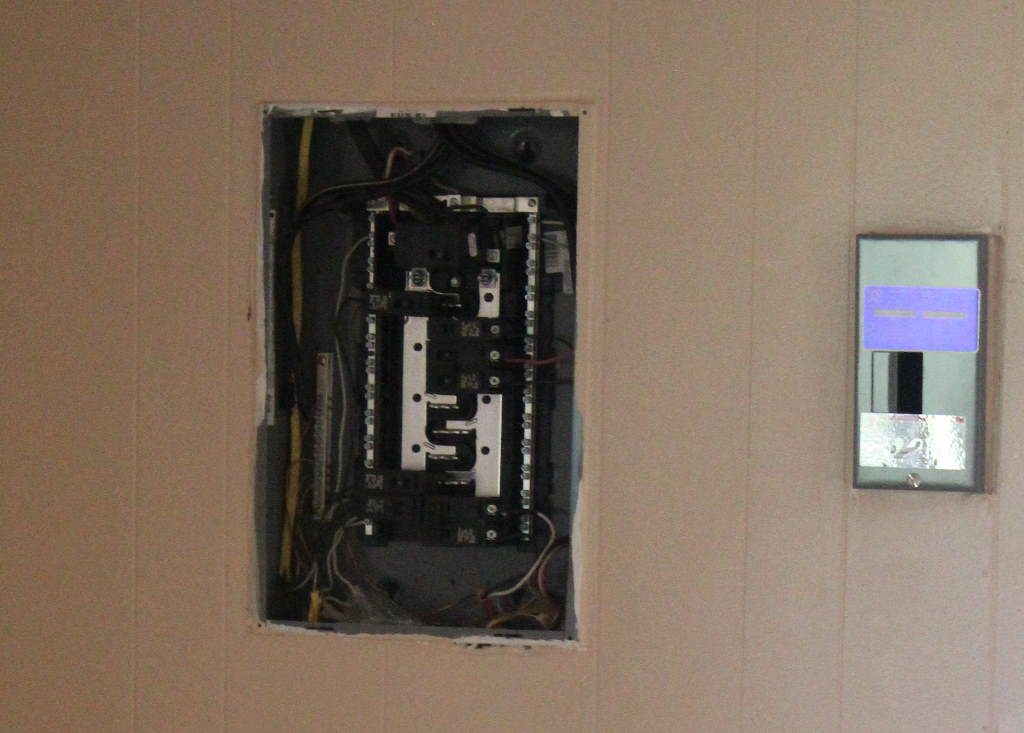
Here’s a little before/after for the new load center. Left photo shows most of the circuits running into the box but at this point I still had a few 240 VAC circuits to run. However, it still shows the 10 AWG feed. Photo on the right shows the new 2 AWG feed from house distribution panel is in-place and waiting to be transitioned in. The sub-panel is fed by a 70 amp breaker in the main panel. The small load center to the right of the main one is the distribution panel for my off-grid solar/battery powered source to a few isolated outlets in the shack. This part is still a work in progress, but the infrastructure is there.

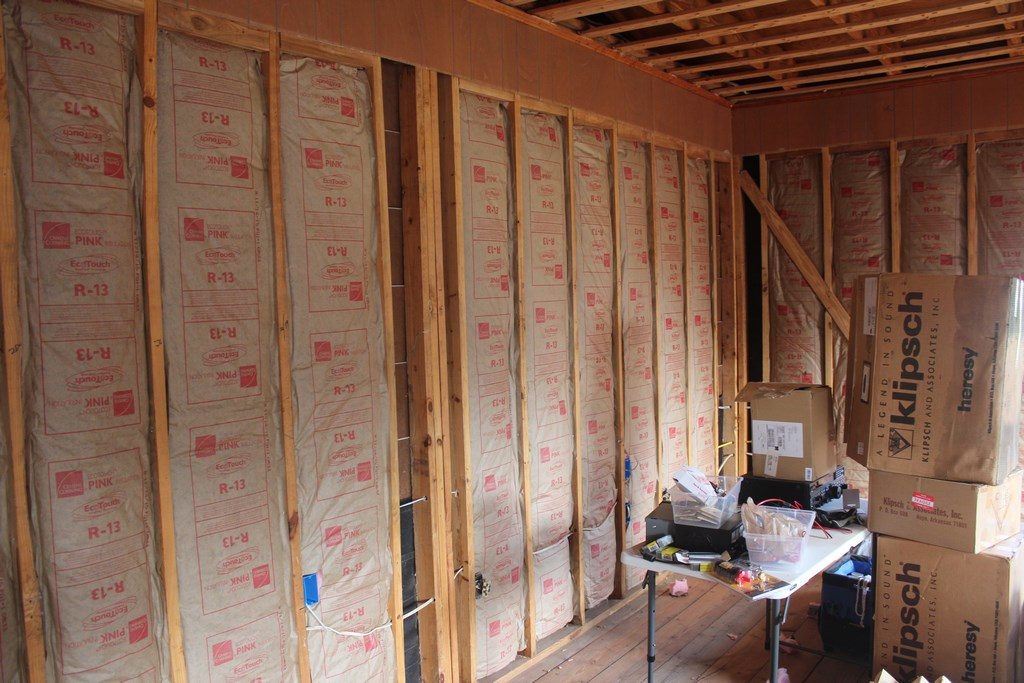
With the wiring done it was time to insulate the walls. A slow and tedious process stapling and cutting around all the outlet boxes, but just grunt work. Of course either the original owner or builder decided these walls needed to be 9′ high, not 8’… thus the little 1′ border around the top. I popped the nails on the bottom of these panel pieces so they could be slightly lifted away from the wall and slid some insulation into the space.
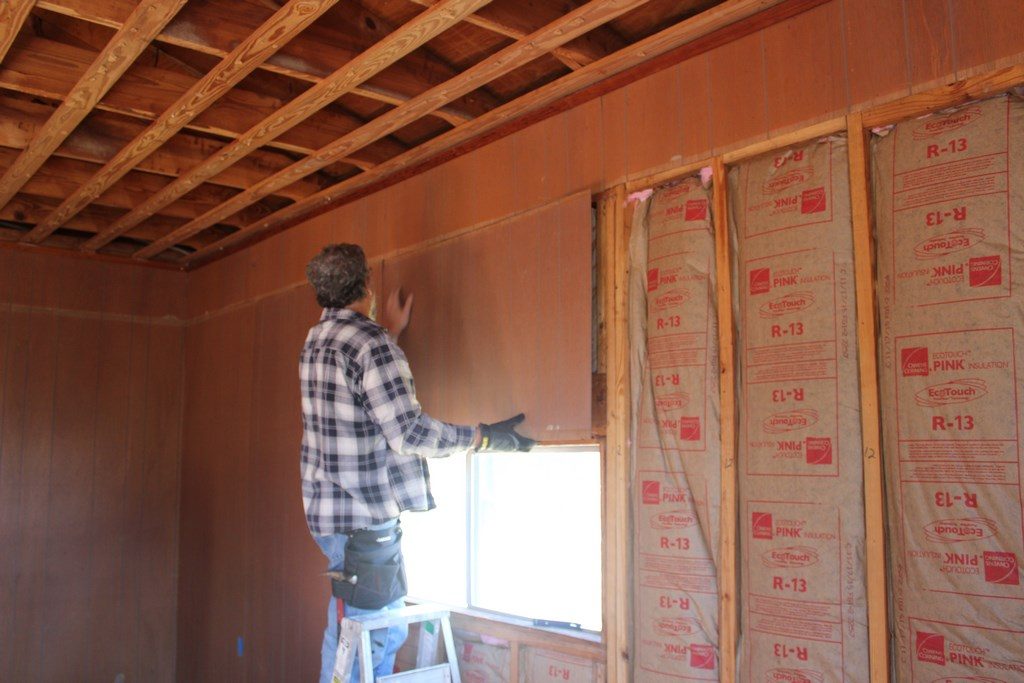

Next step … rehang the paneling. This was going to be the moment of truth on whether reuse of the panels was going to be practical. As I got started I was encouraged as pieces were fitting really well. My marking definitely paid off. I had even marked the joining points on the center of studs where two pieces came together. This helped keep me aligned. Since I was mostly working alone here I had to use my head at times, as can be seen in the top right photo holding the small piece above a window in place while I got a nail out and put it in at the top center of the panel to hold it in place. Since at this point I still had a little electrical work to complete at the load center I left that corner exposed until the very end.


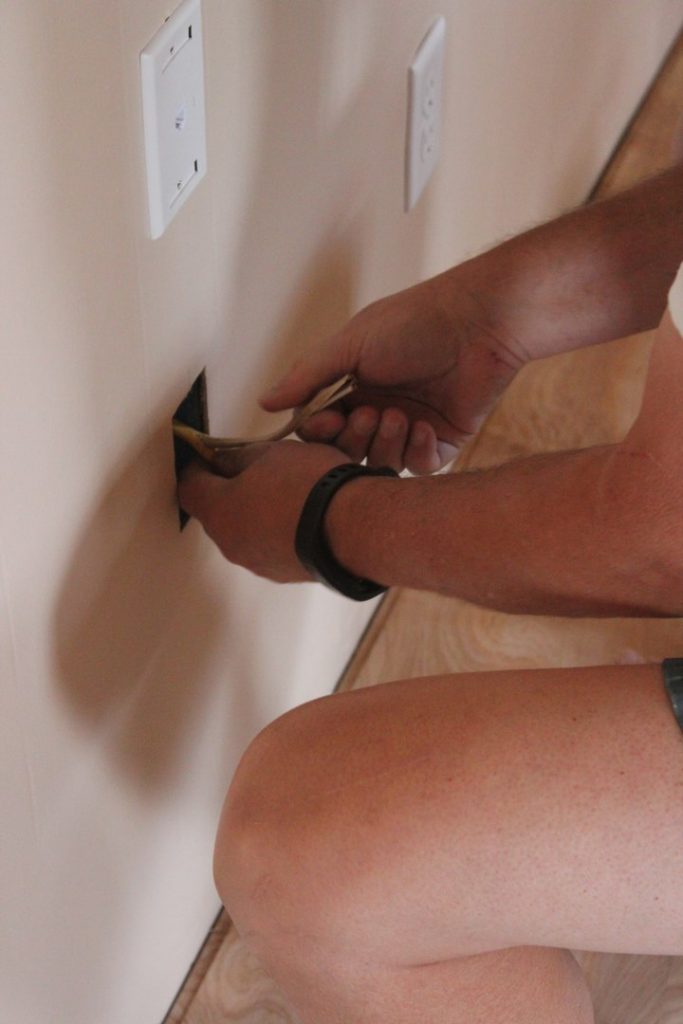
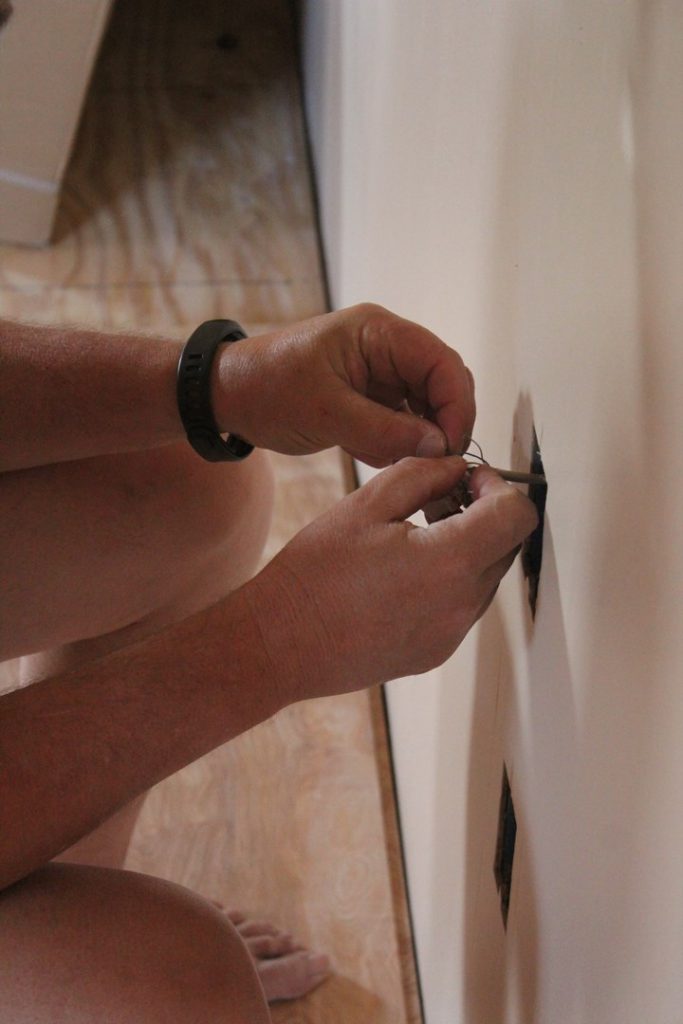
While the original outlet boxes were lining up well with their holes in the panels, all of the new boxes were going to have to be cut out. Above is a trick I learned when hanging sheet-rock when we rebuilt our Kiln home after Katrina. A Roto-Zip tool with a cutting bit works well. Roto-Zip makes a variety of different cutting bits. I used a wood cutting bit for this rather than the sheet-rock bit. To get close to the center of a box I would measure from wall and floor to the center of each box on a panel before putting the panel up. With the panel loosely in place and nailed at the top I just measure across and up to find where the center of a box should be. With a little practice this works great, and I had a LOT of practice in the Kiln house. Basically you insert the Roto-Zip bit into the center point of the box and cut a SMALL circle to make sure you are really in the box. If so, simply move the tool towards the edge of the box and follow it around. If you miss the first time, you just have a small hole to patch. Once the boxes are cut out press the panel in place and finish nailing. Be sure to tuck the wires, either electrical or networking, as far into the back of the outlet boxes as you can get them AND set the depth guide on the Roto-Zip so the bit only goes as deep as needed. This keeps the wires clear of the cutting bit. To be 100% safe, PLEASE deactivate the circuits on any electrical boxes you are cutting out, just in case.
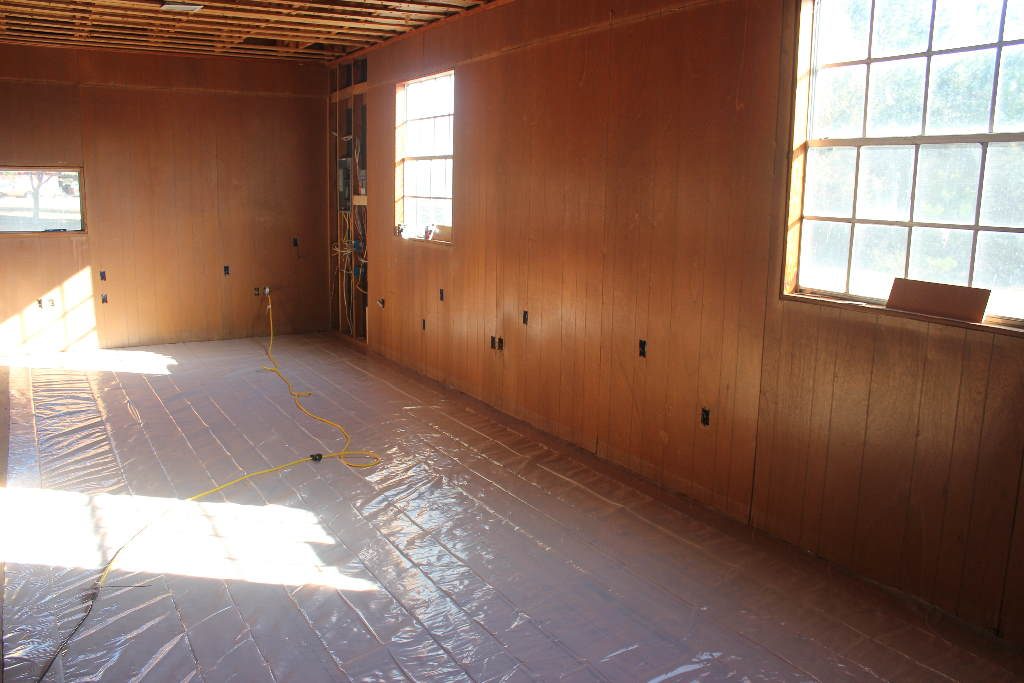
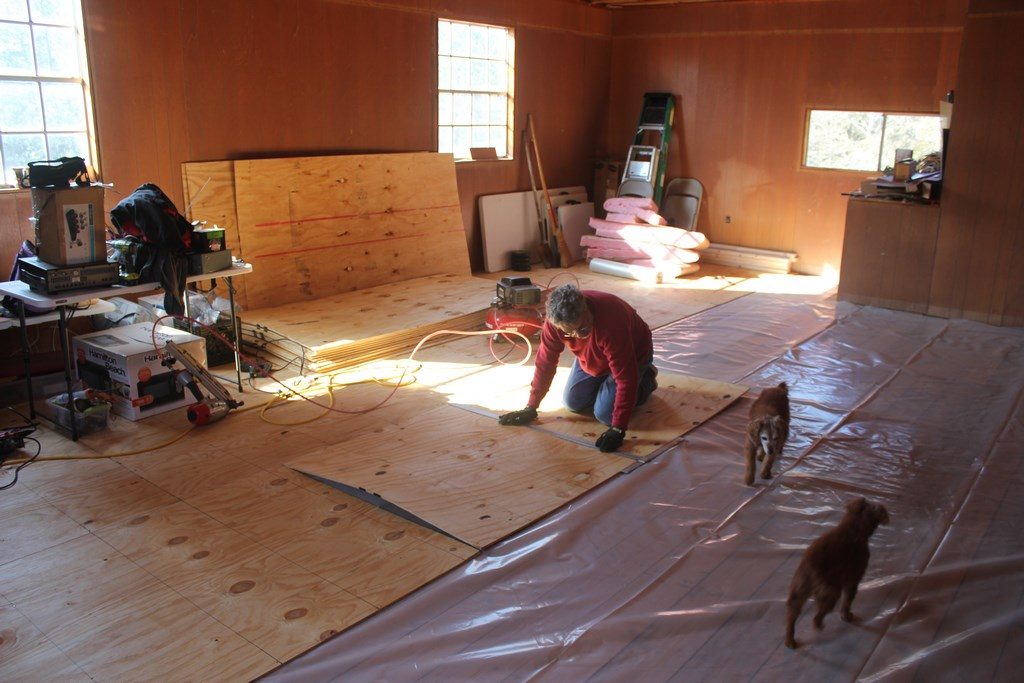

The photo on the top left shows 2 of the walls with panel rehung and outlet boxes cut out. At this point I started preparing to lay new sub-flooring to provide a base for the new laminate flooring I wanted to put down. I first rolled out a visqueen moisture barrier over the 2″x6″ base floor boards. and then nailed the plywood underlayment in place. Top right photo you can see Cricket and Sophie (now SPs – Silent Paws) supervising. They were with us for 16 years and were dear family members. You’ll also notice the constant shifting of various “stuff” that I was keeping in the room as I was building it out. I did the sub-floor in sections, moving the stuff from one side to the other.
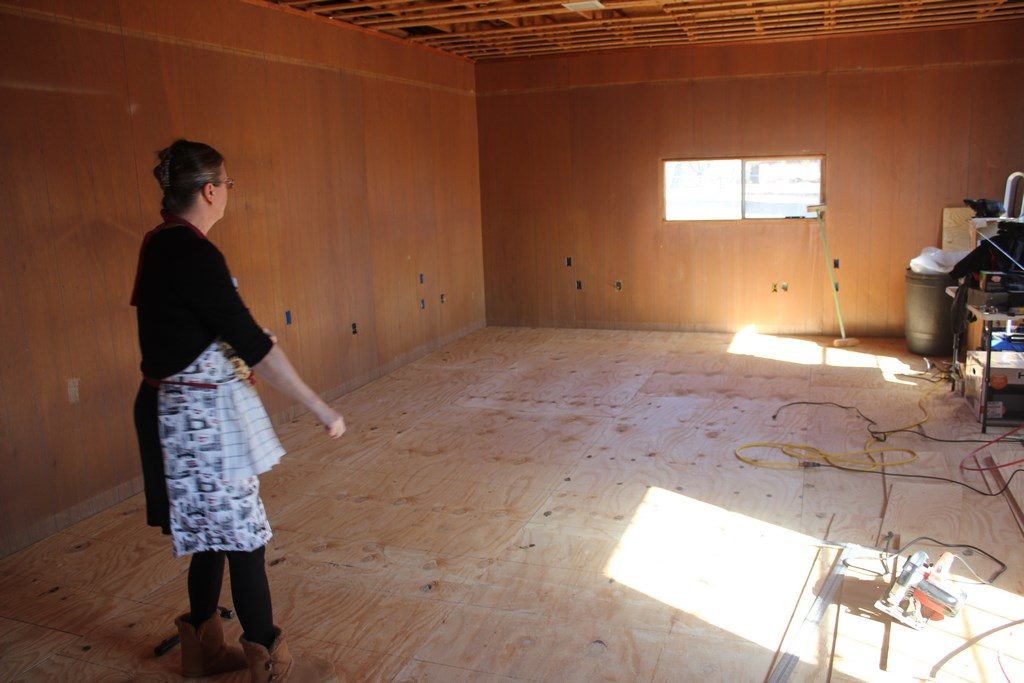
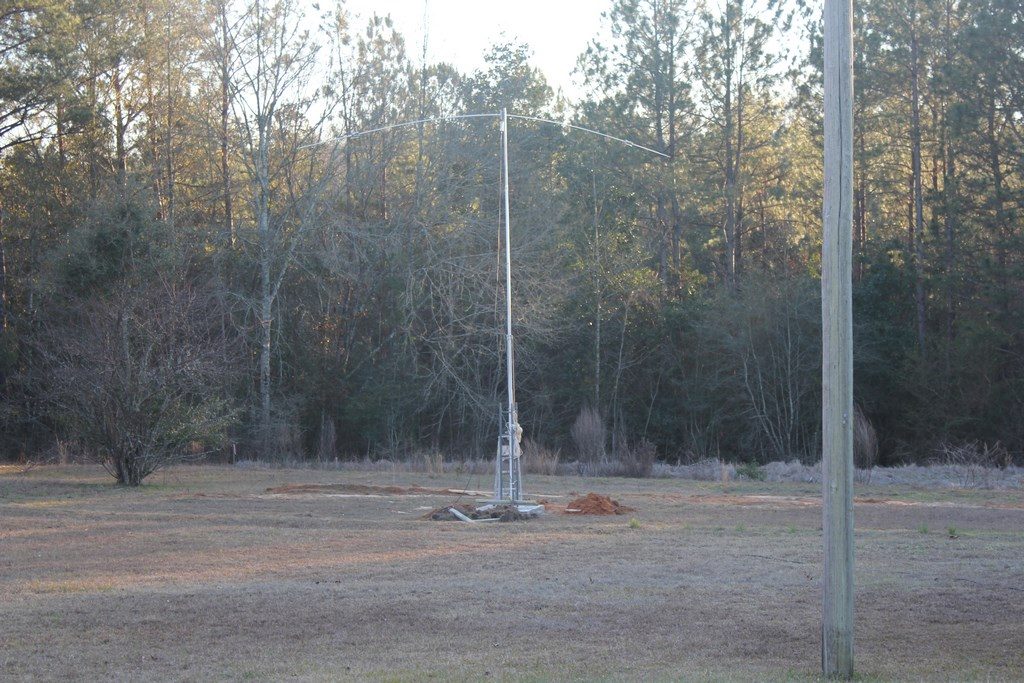
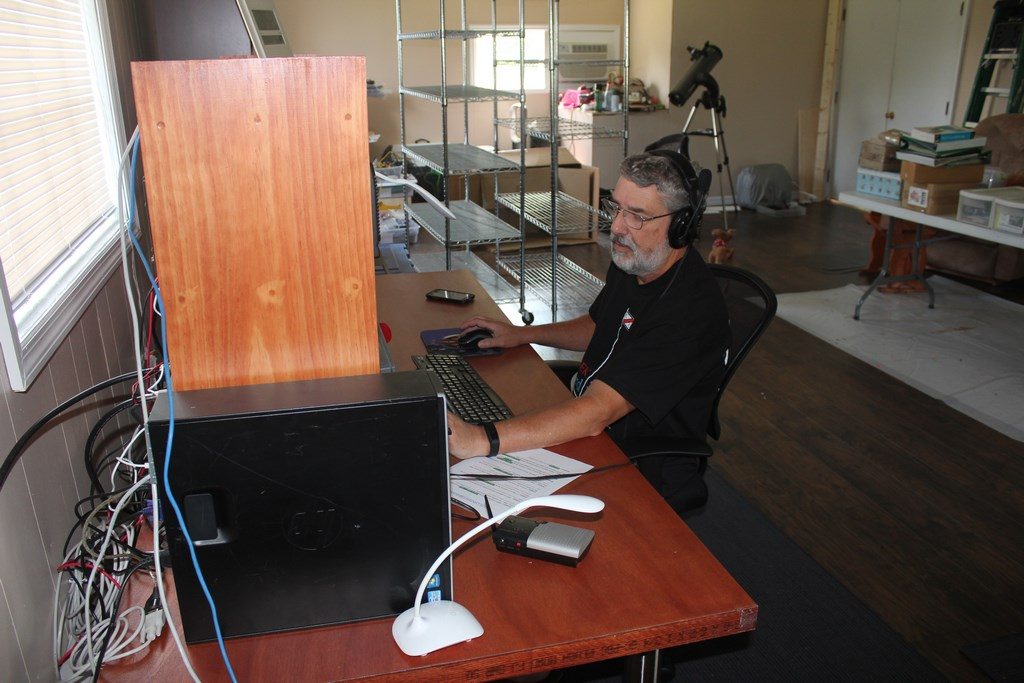
Kathy comes in to inspect and gives her approval. You can also see in the second photo I was so anxious to get something on the air I had setup a folding table with my FT-950 and a laptop. I also installed a temporary 30M rotatable dipole on a push-up pole lashed to the base section of my Rohn 25G tower. The tower base had been set in-place by K2FF and I a few weeks earlier.
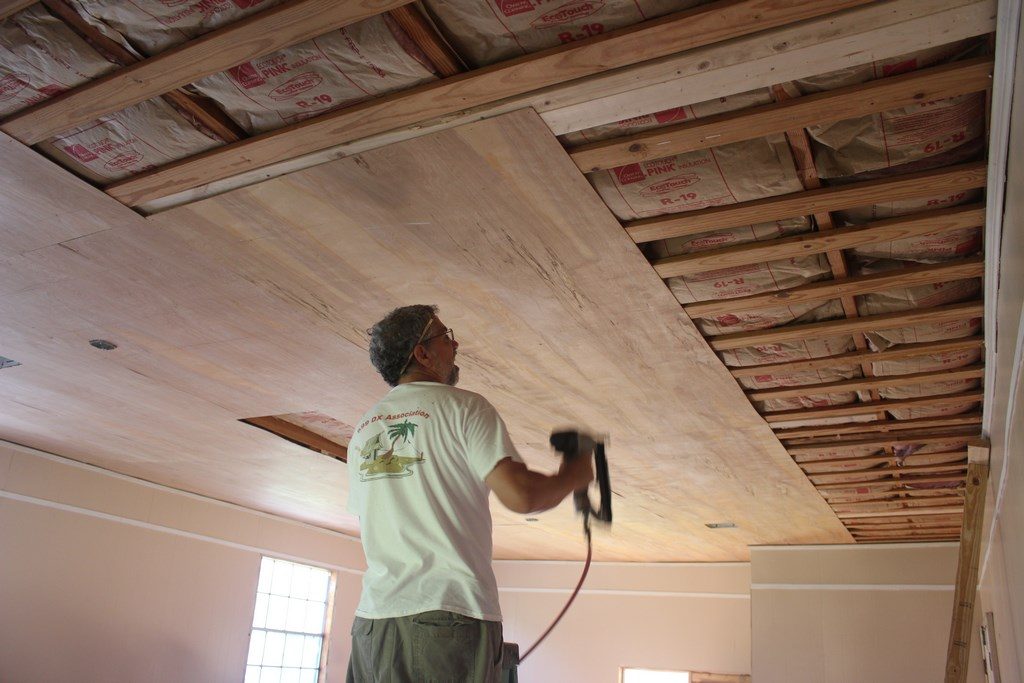
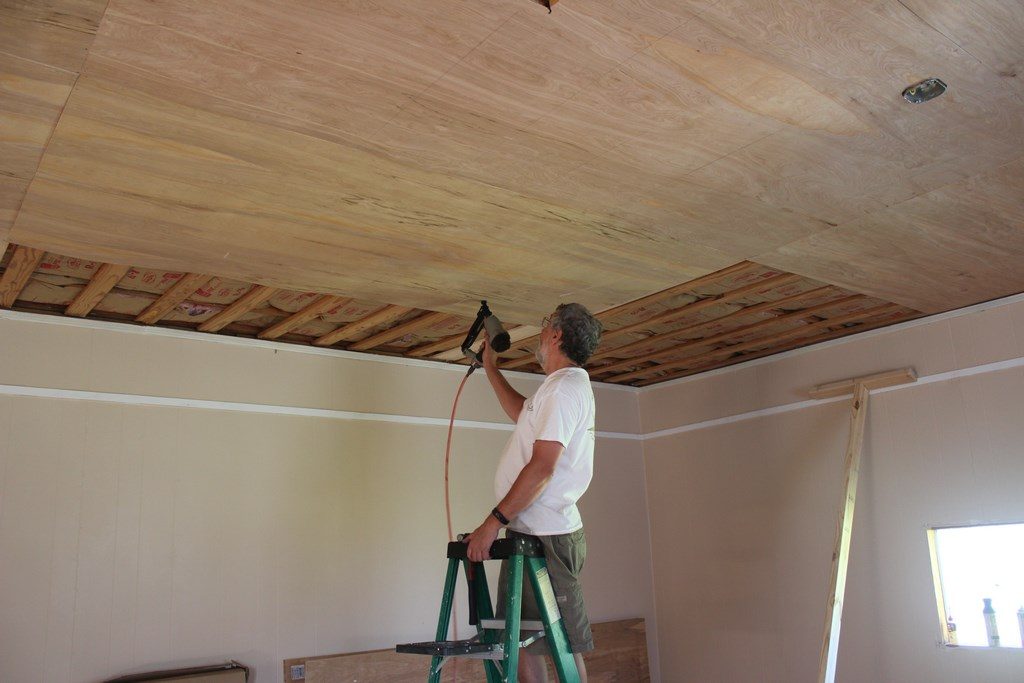
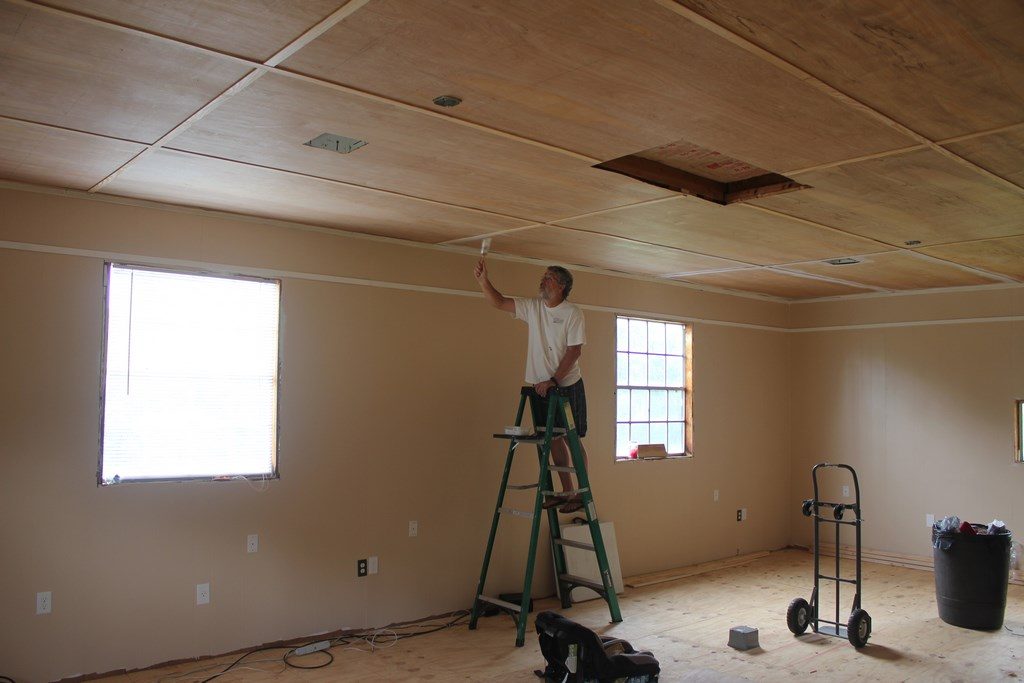
Once the sub-floor was down I patched and painted the walls. Didn’t get any photos of this step but you can see some of the results in the photos above of me nailing the ceiling in place. Note there is also insulation in the attic now as well. And Oh, yes, there was the 1000s of staples that had to be removed from the 1″x4″ ceiling support boards. The original ceiling had been small acoustical tiles stapled in place. The previous owners pulled the tile down, but left the staples… For a ceiling I opted for lauan plywood. Since there was a good support structure for me to nail it to I could keep it from sagging and it’s nice and light to work with. I finished it with 1.5″ lattice strips between the seams. That 2×4 “T” you see in the photos was one of two that I used as my “helper”. Kathy would would place one on one end of the panel as I held it in place over my head. Once it was there I would tack a few nails in place and she would go put the other one under the other end of the panel for me to put a few more nails in the center. This held it up enough for me to finish the nailing. It worked and no one got hurt..

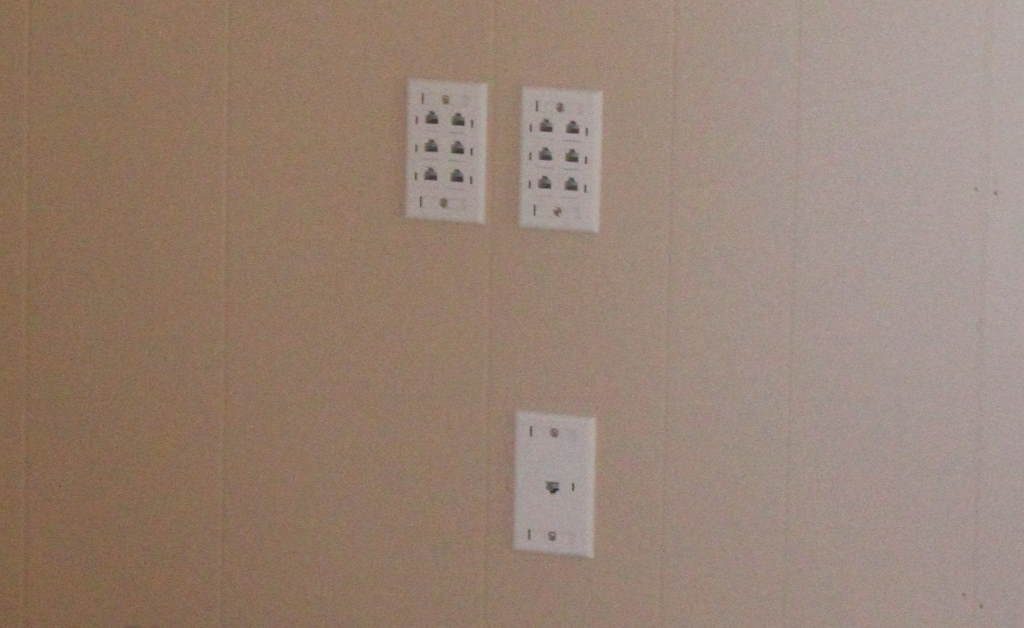
After getting the ceiling hung I moved on to finishing the outlet boxes and terminating the Ethernet cables. The last photo on the bottom right shows the distribution point. I wall mounted a Gigabit Ethernet switch on the wall just above the two outlet boxes and ran short jumpers.
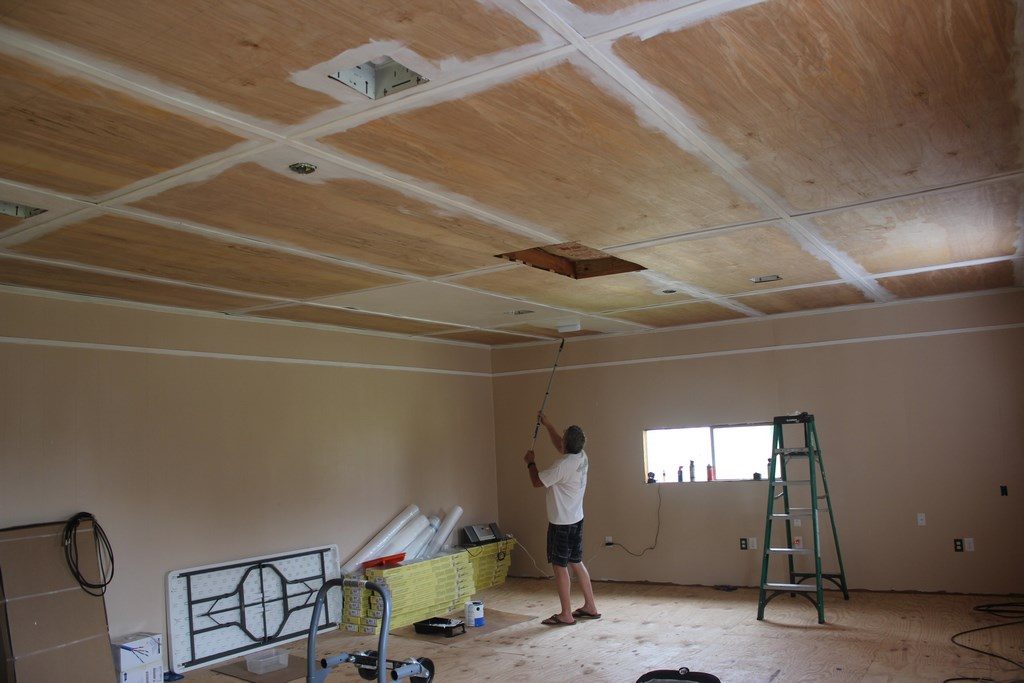
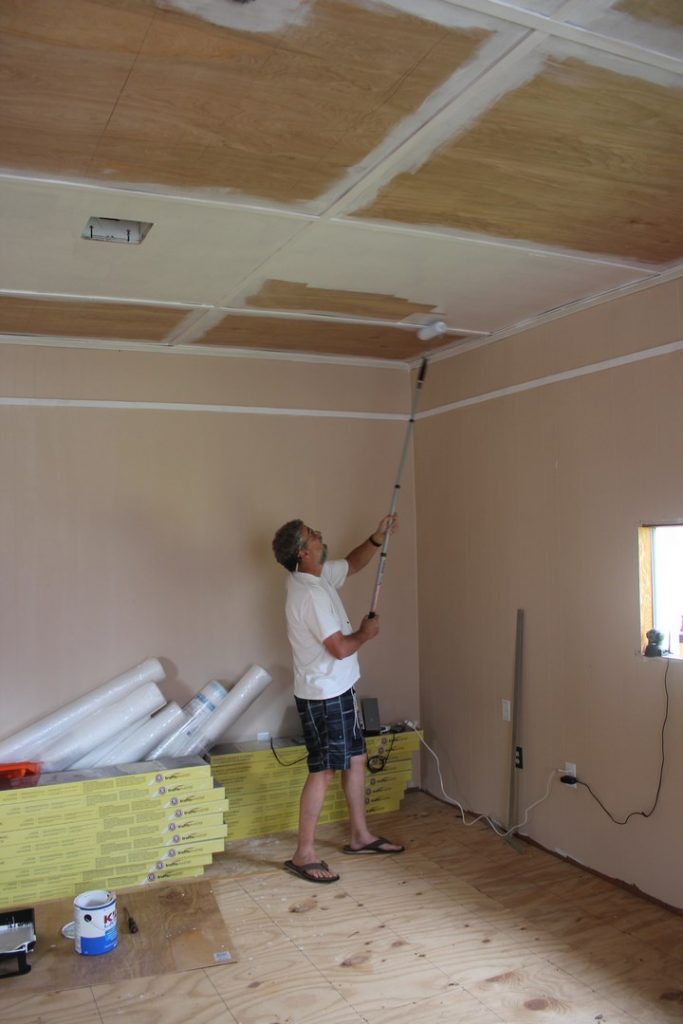
On to painting the ceiling. Hindsight being what it is I probably should have painted the ceiling first, before the walls. This would have saved me some touch-up work on the walls due to splatters, but all in all, it wasn’t that bad. I wiped up most of them as I went. In the second two photos you can see the materials for the next step… laminate flooring.
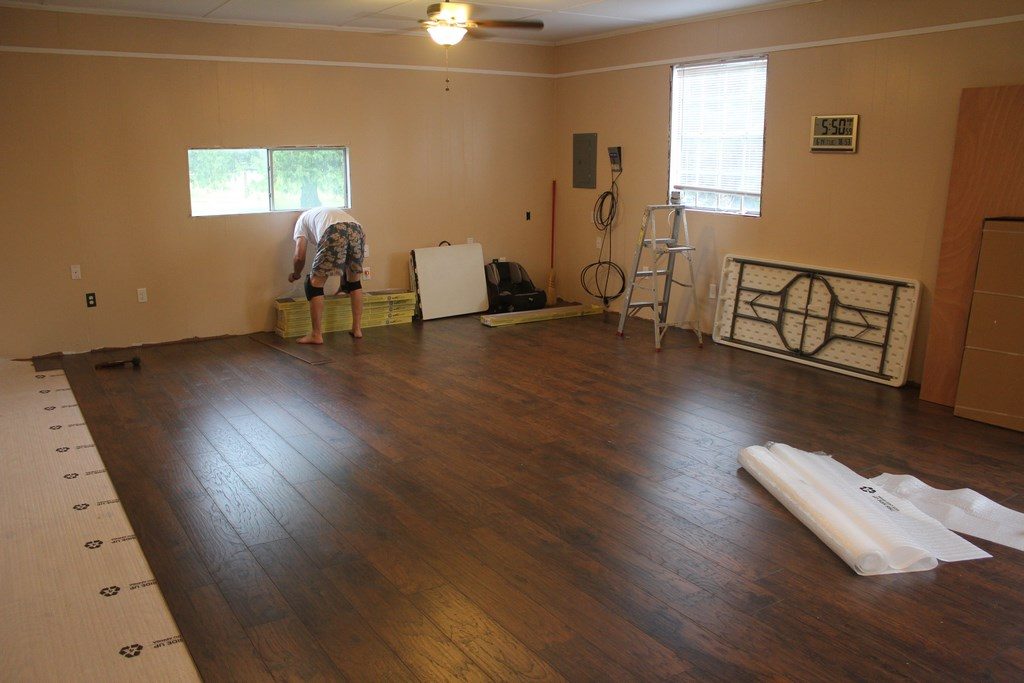
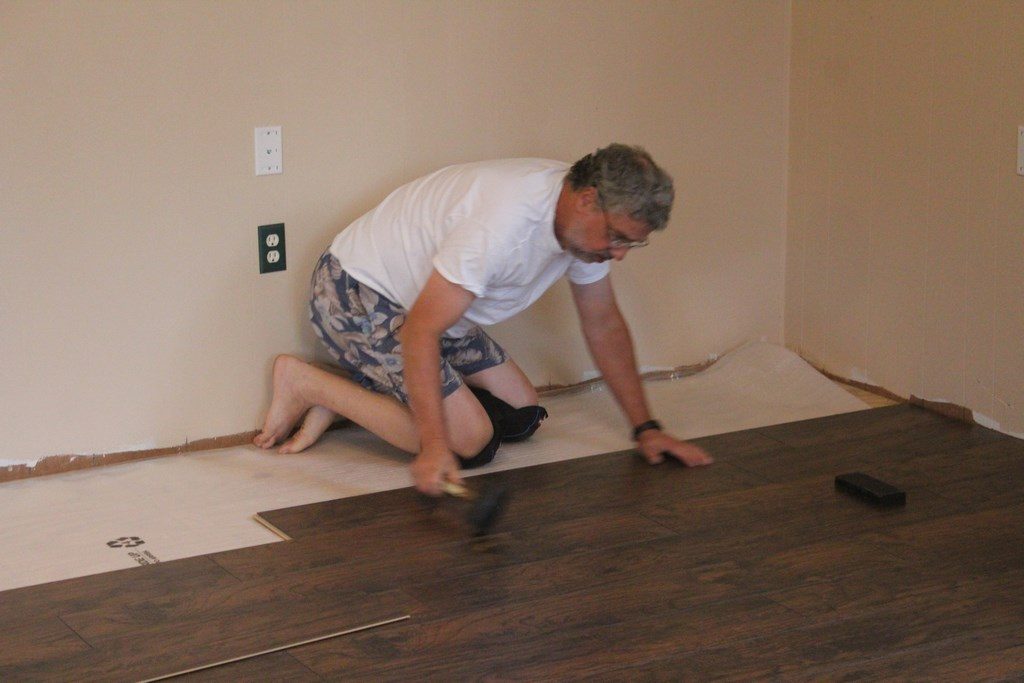

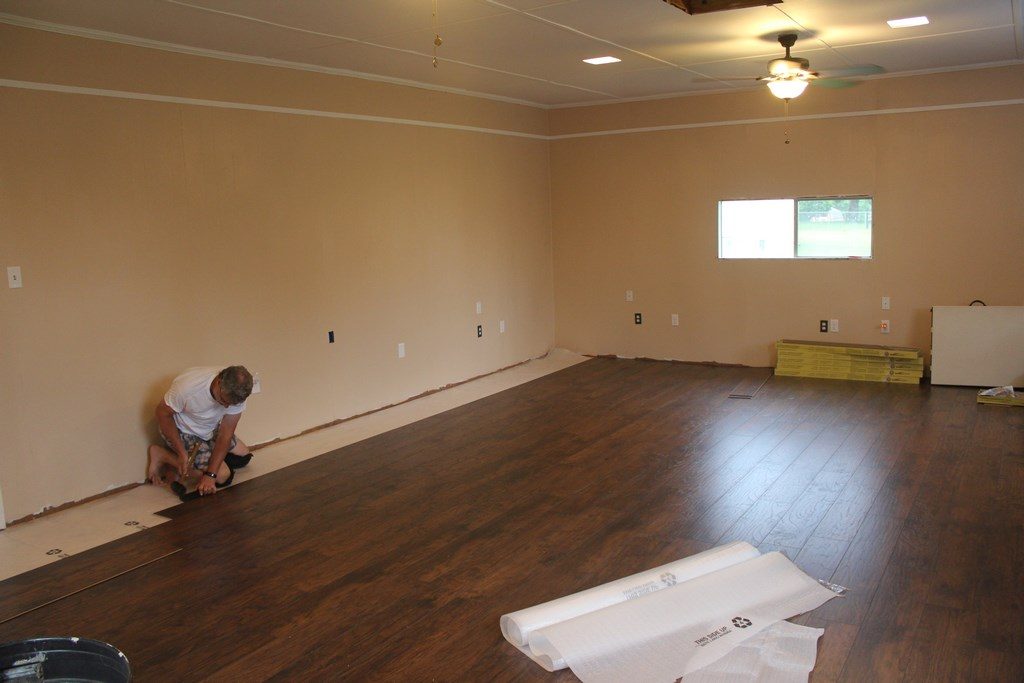
Interlocking laminate flooring is not my favorite thing in the world to do but this particular brand from Lowes (Traffic Master Glueless 15 Year) was fairly high quality and went in pretty easily.. The knee pads are a MUST however. The photographer didn’t arrive until I was down to the last few rows… Hmmm, I wonder why?? In the bottom right photo you can also see one of the two ceiling fans I installed on either end of the room. In these photos you can also see my isolated, solar/battery powered outlets. They have the green outlet covers. I have several 100W solar panels but haven’t really gotten this project off the ground yet.
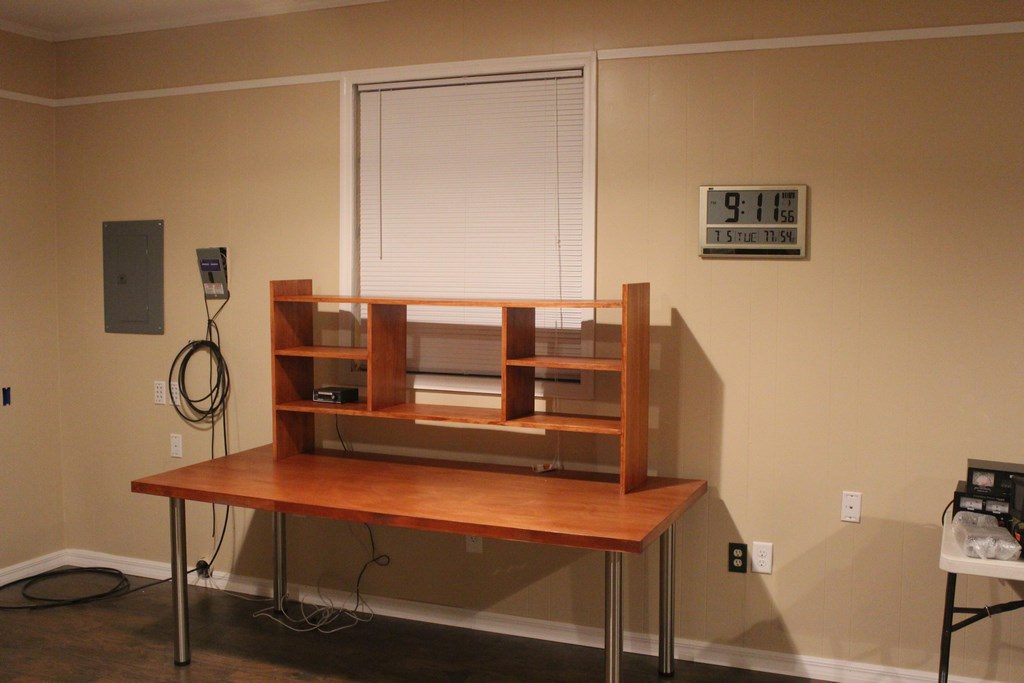
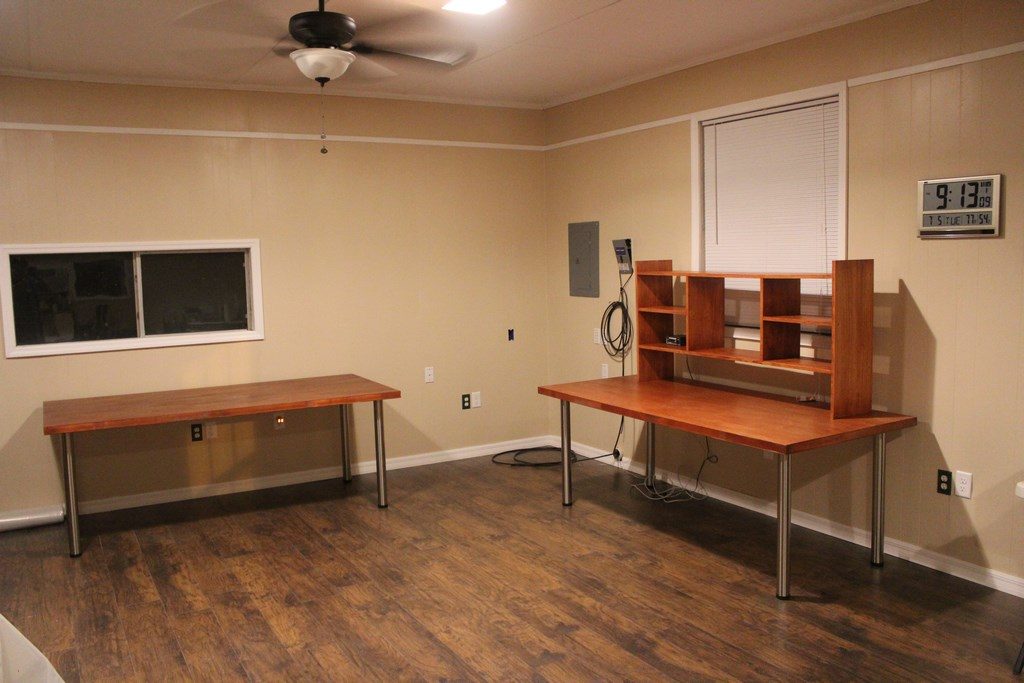
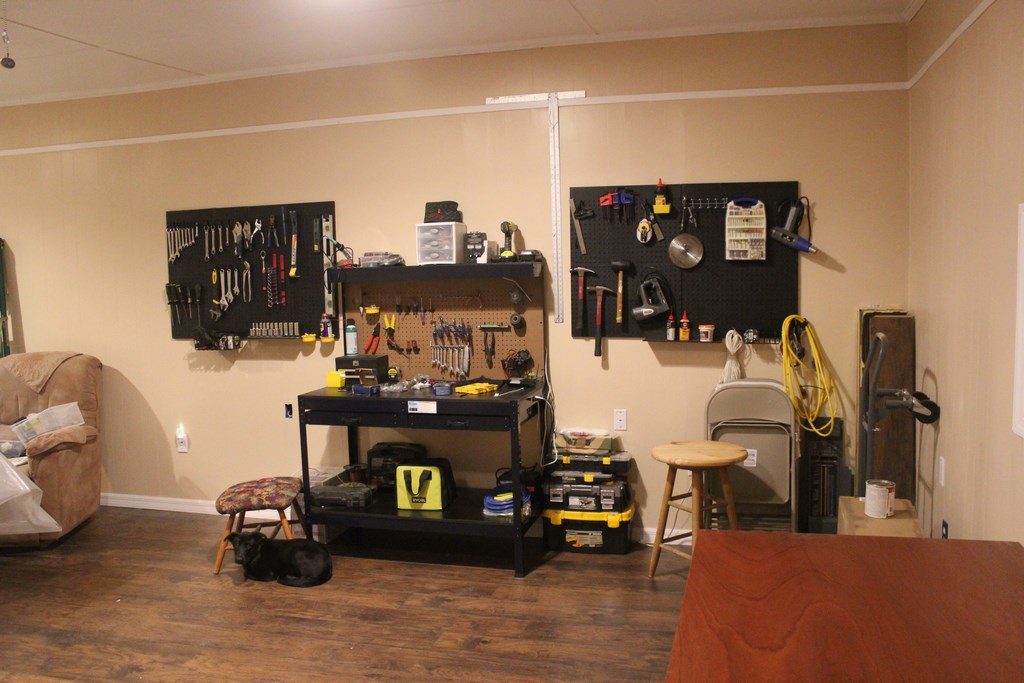
Finally coming together as a ham shack. I built the operator tables from 2 solid core doors. The stainless steel legs were found on eBay. The credenza on the table to the right was also hand-made by me from relatively inexpensive 12″ pine boards. I also built a smaller version for the second operator position table. Bottom right photo shows my workbench. One of the things I really liked about having this big of a space was the ability to put my tools and a workbench right in the shack.

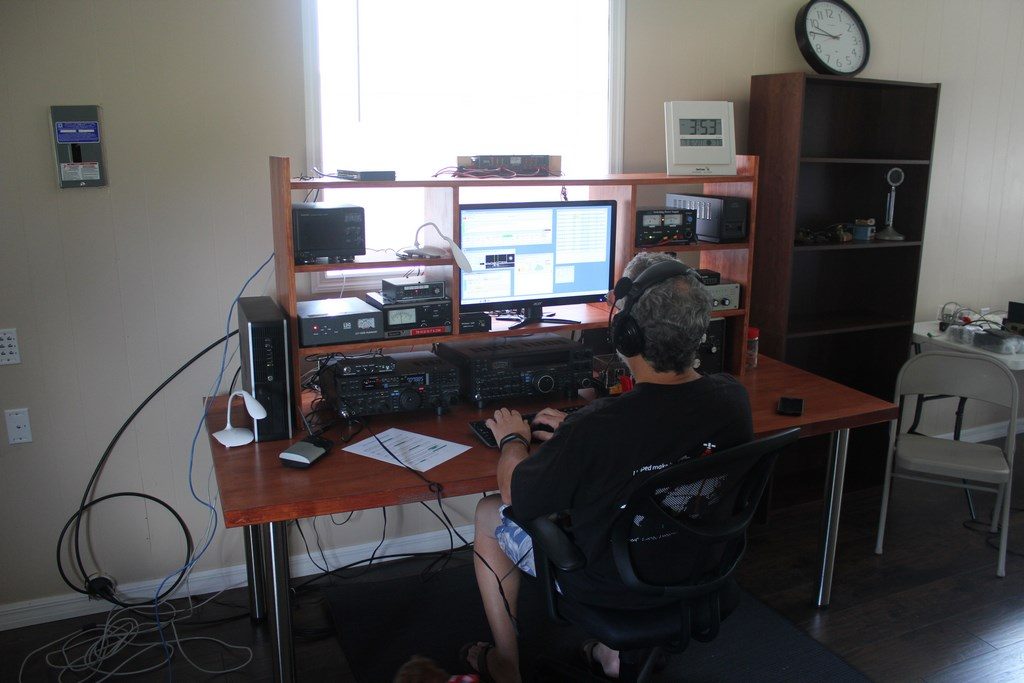
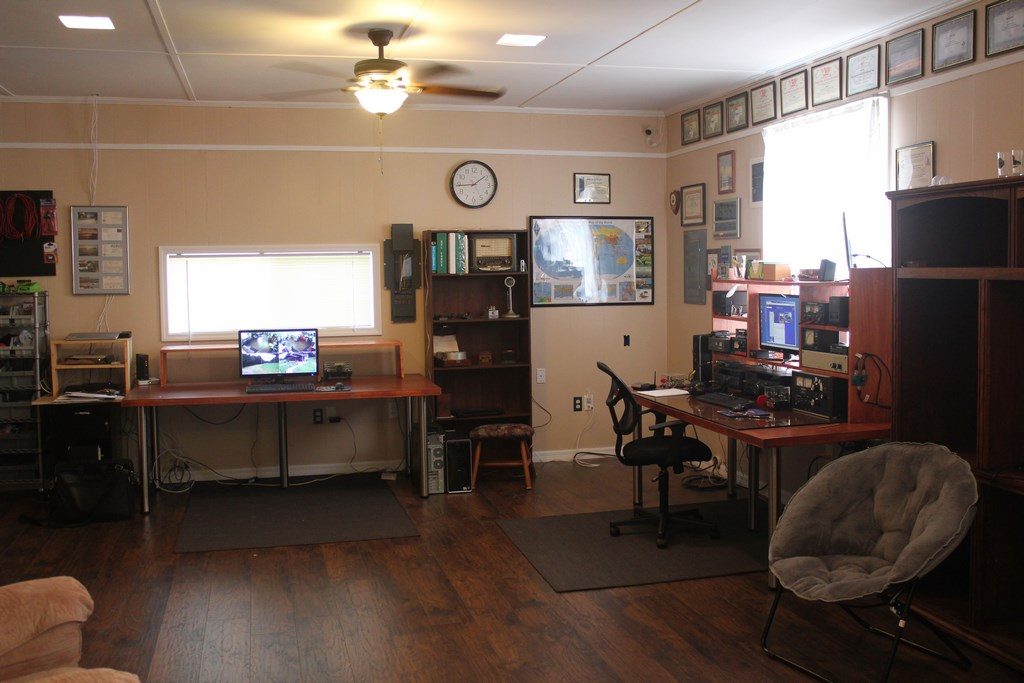
This was my first contest in the new station.. July 2016 NAQP RTTY. I had started this project around December of 2015, a few months after moving into the new house in Lumberton and it took me the better part of 6 months to complete, although as most hams know, “complete” is a relative word as we are ALWAYS changing things… so, stay tuned.
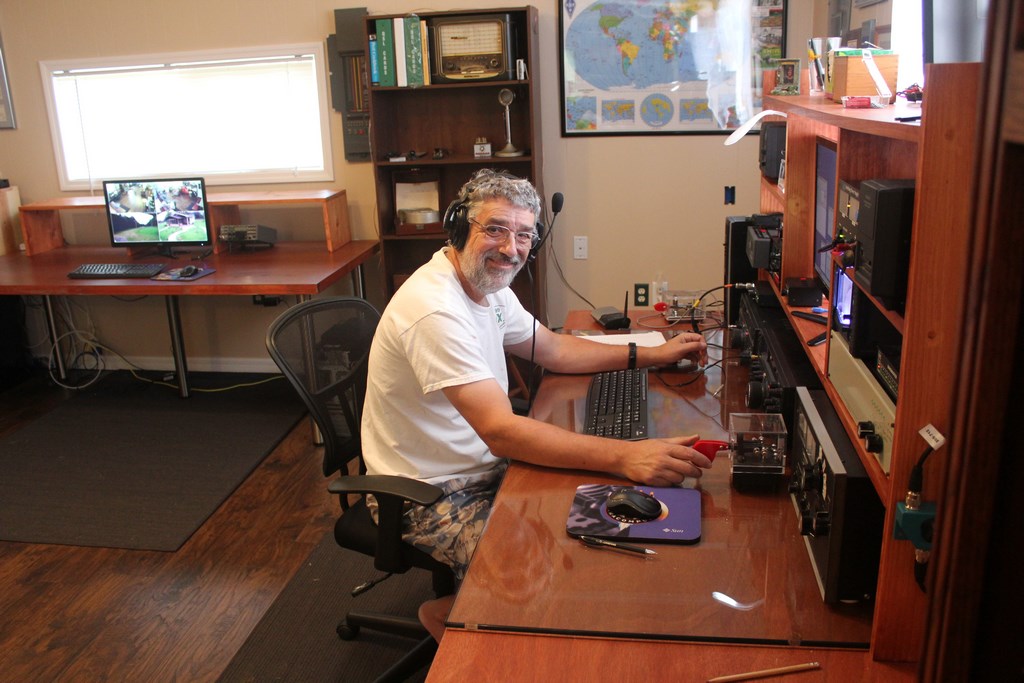
A happy camper, for sure!!!