

Recently I decided to mod my SixPak 2 radio control head to be automatically switched. I have 2 early model Bandmaster decoders that I have been using for several years to auto switch 2 old Hamation Shack-Lan 6-band bandpass filters. One set is installed on each station in the shack. The filters are switched via the Shack-Lan interface leaving J3 on the Bandmaster available to provide the one wire per band signaling needed for the SixPak controller.
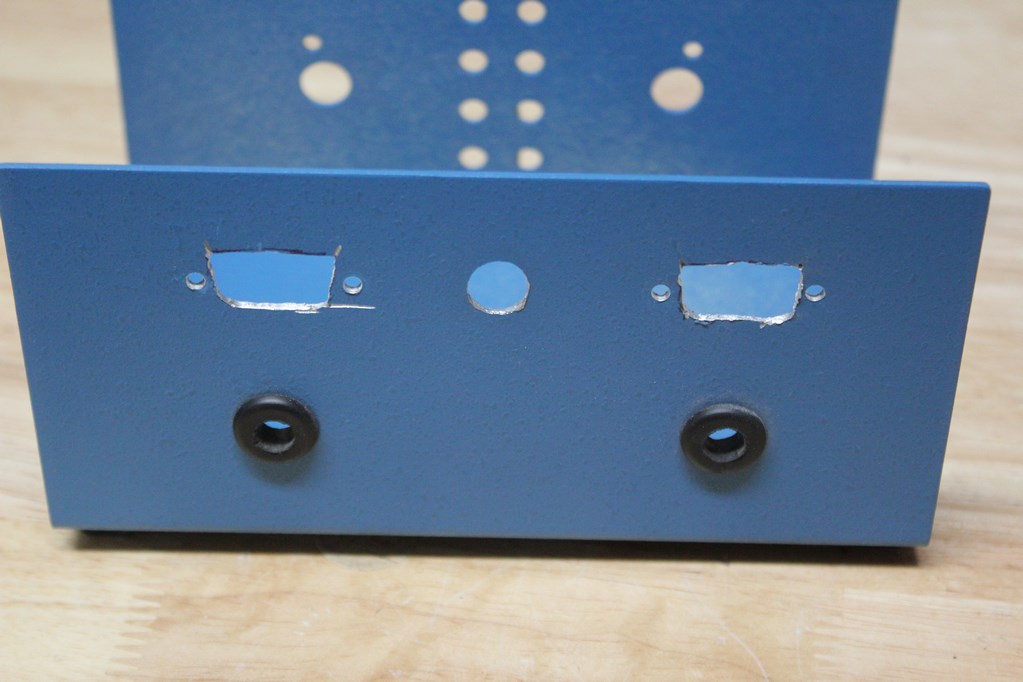

I began with the necessary chassis mods to accommodate mounting the two DB15HD connectors that would be used to connect to each station’s Bandmaster J3. As you can see in the left photo the cutting was not elegant. I used my Dremel with a small metal cutting wheel to get each opening close. Then fine tuned them with a small grinding head on the Dremel. The hole in-between the two connectors is for the 12VDC switching voltage to be routed into the box and already existed. Even though my cutting was not very pretty, the dimensions were tight enough so that the connector shells covered the ugliness.
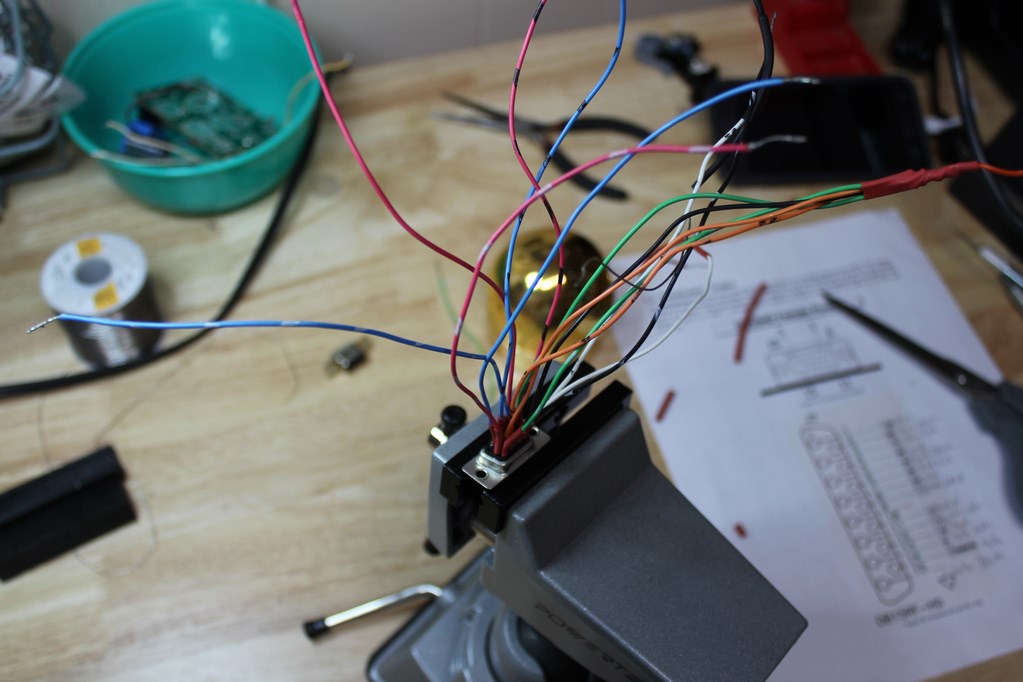
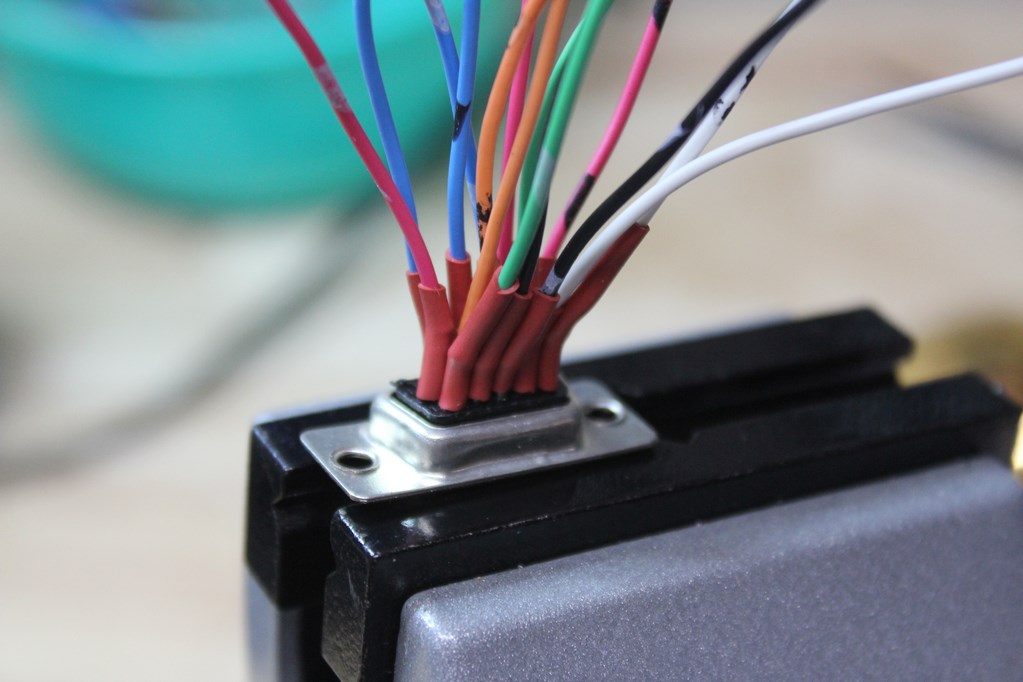
With the chassis ready it was time to tackle the hard part of this job. Soldering the tiny DB15HD connectors. A very fine pointed tip was used on the variable temp soldering iron. After a little trial and error I settled on a temp of about 350C and used Kester #44 fine core solder. I found soldering the middle row first made the whole process a little easier. As can be seen in the photos above, each pin was covered with heat shrink tubing for added protection against shorts.
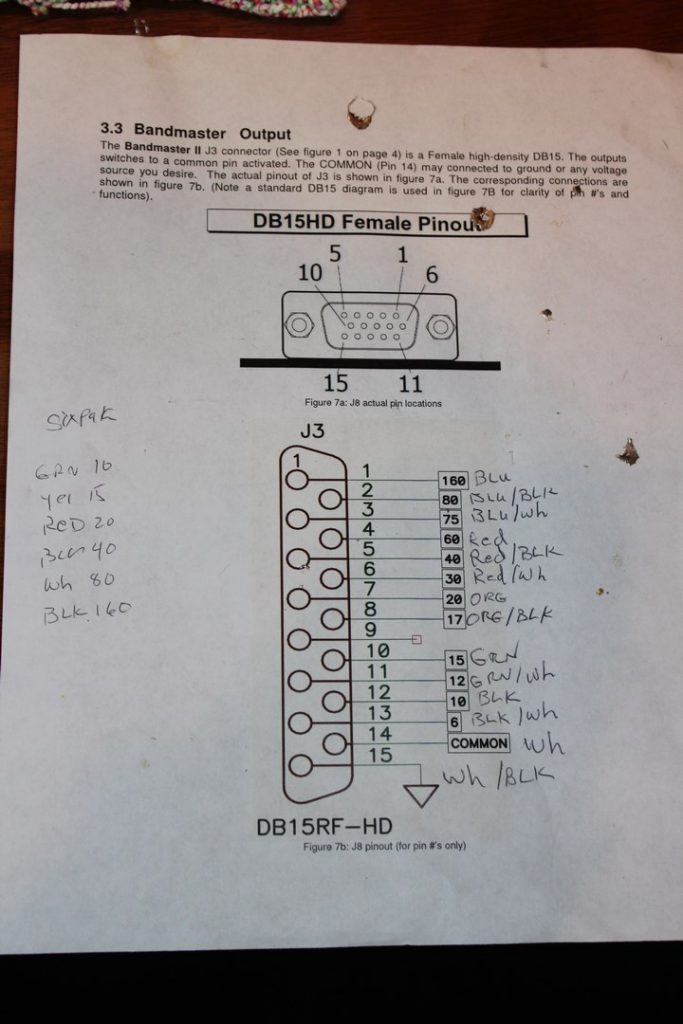
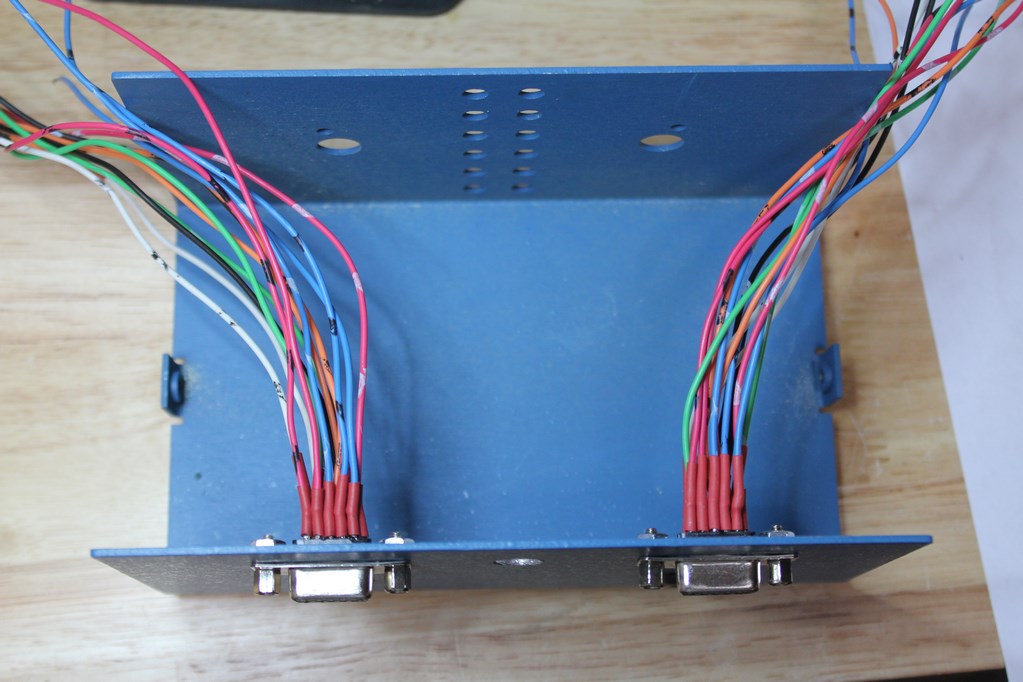
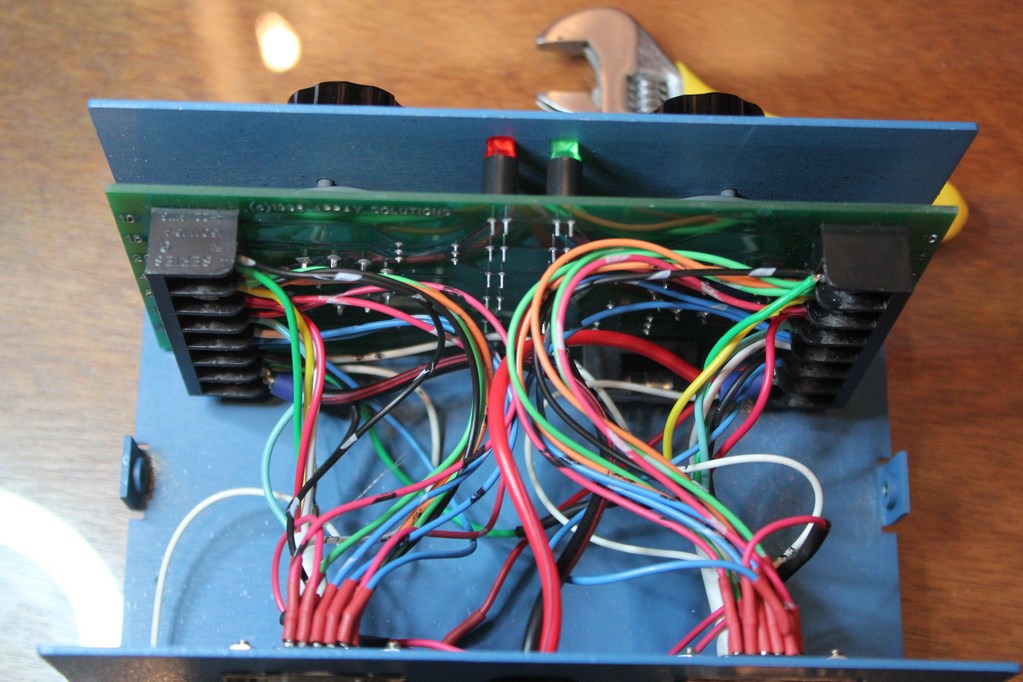
I printed a page from the Bandmaster manual and documented my color code for each band. For my installation the wires for 10/12/15/17/20M were all tied together and connected to the port that my Tennadyne T8 LPDA is installed. All of the other band wires were routed to the appropriate port. Middle photo above shows the wired up connectors installed in the chassis ready to be connected to the controller board. I found it much easier to not mount the controller board in the chassis until all of the wires were attached to the terminal strips. The wires from the DB15HD connectors were connected together with the wires going out to the tower mounted switching box.
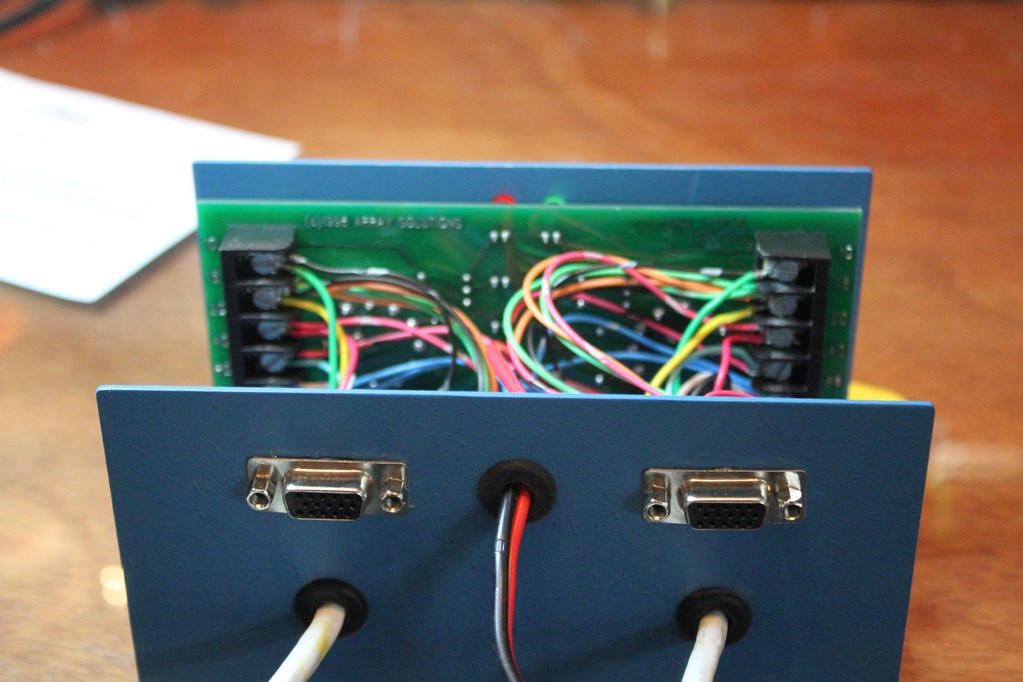
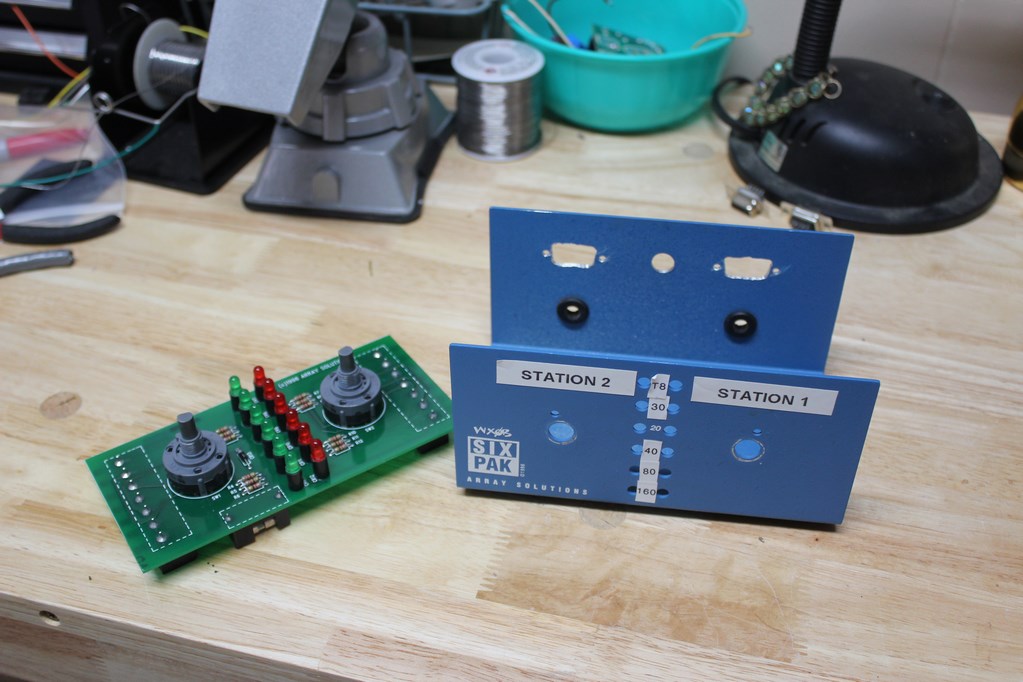
Rear view of the finished product with top removed and the controller installed in the Station 1 console. At this time the Station 1 side (primary station) is connected to the Bandmaster for automated antenna switching. Station 2 is still manually switched until I can build a straight through DB15M-DB15M cable to reach the Station 2 Bandmaster.
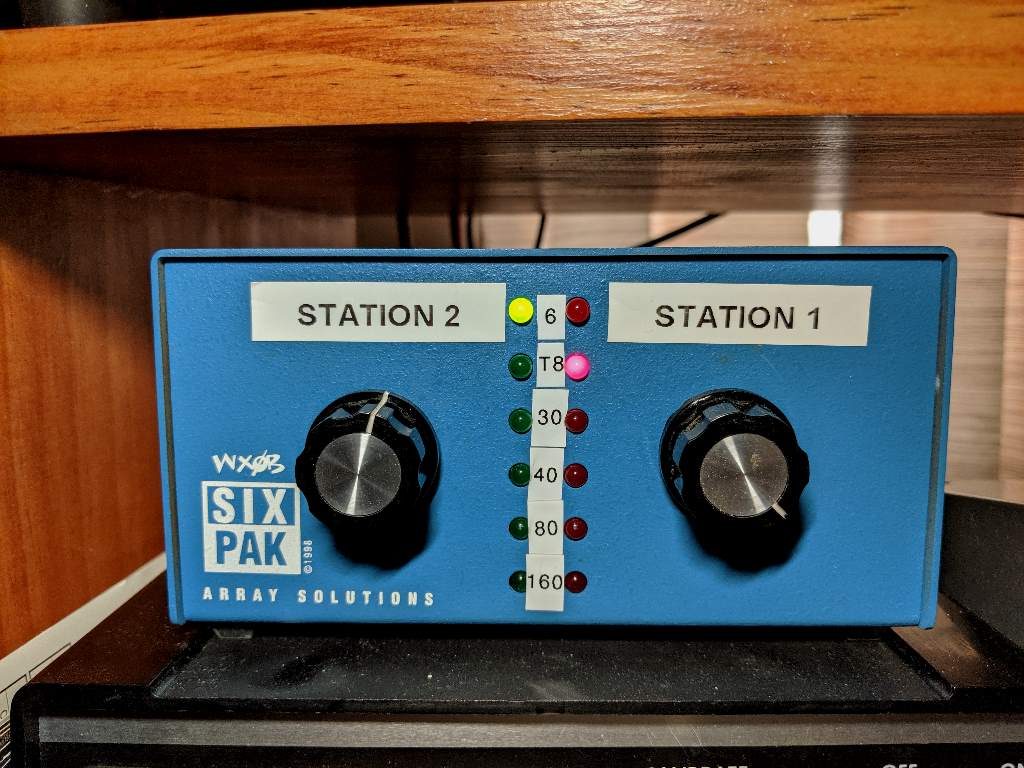
Here’s a video showing the modified controller in action. In case you are wondering how the K3 was changing bands it was via the K-Pod. It was the only way I could figure out how to keep the camera focused and steady at the same time. I had one finger on the K-Pod during the band changes.